Connect your site, copy your Checkify Pass ID, choose what you want to verify, and drop Checkify into login, checkout, comments, contact forms, or your own custom flow.
Checkify is designed so you can request proof like human verified or age over 18 without building your own identity stack or storing unnecessary personal data.
WordPress plugin or custom SDK — both use the same Checkify Pass and server verify flow.
Install the Checkify plugin, connect your site, and protect checkout, login, comments, and forms without writing code.
WordPress setup guideAdd the JavaScript embed, bind forms with your Pass ID, and verify results on your backend with a site API key.
SDK quickstartCheckify uses two different credentials. Using the wrong one in the wrong place is the most common integration mistake.
Browser embed, WordPress, Joomla — frontend only
Backend verify API — server only, never in JavaScript
The same core flow works whether you are using WordPress adapters or building a custom integration.
Link your website or domain to Checkify so requests are bound to the correct relying party.
Each site gets one Pass ID automatically. Pick a request type such as human verified or age over 18.
Use a plugin adapter or attach it to your own form, button, page, or backend action.
Allow or block the action based on a clear proof result instead of collecting raw identity data.
A practical path from zero to a working Checkify-protected flow.
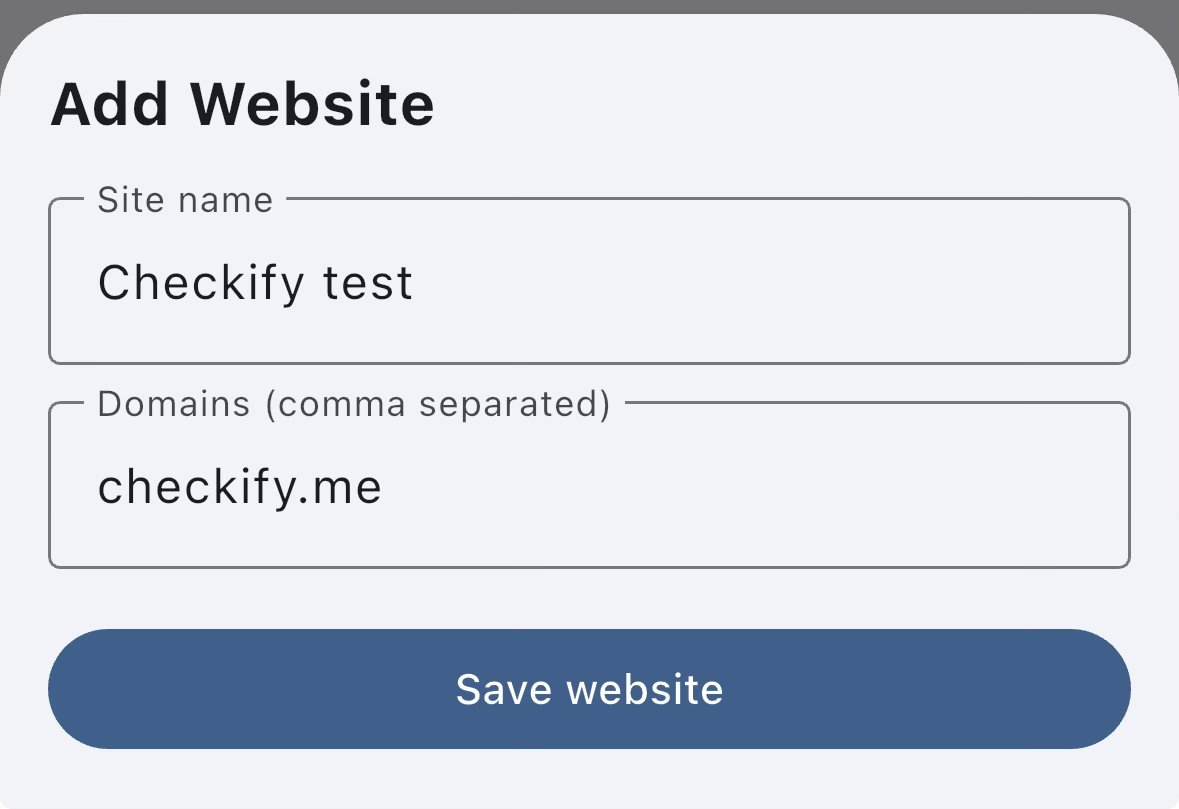
In the Checkify app, create your website entry and add the domain you want to use. This tells Checkify which site the verification flow belongs to.
Once saved, that site gets a Checkify Pass and the allowed domains that control where the embed can run.
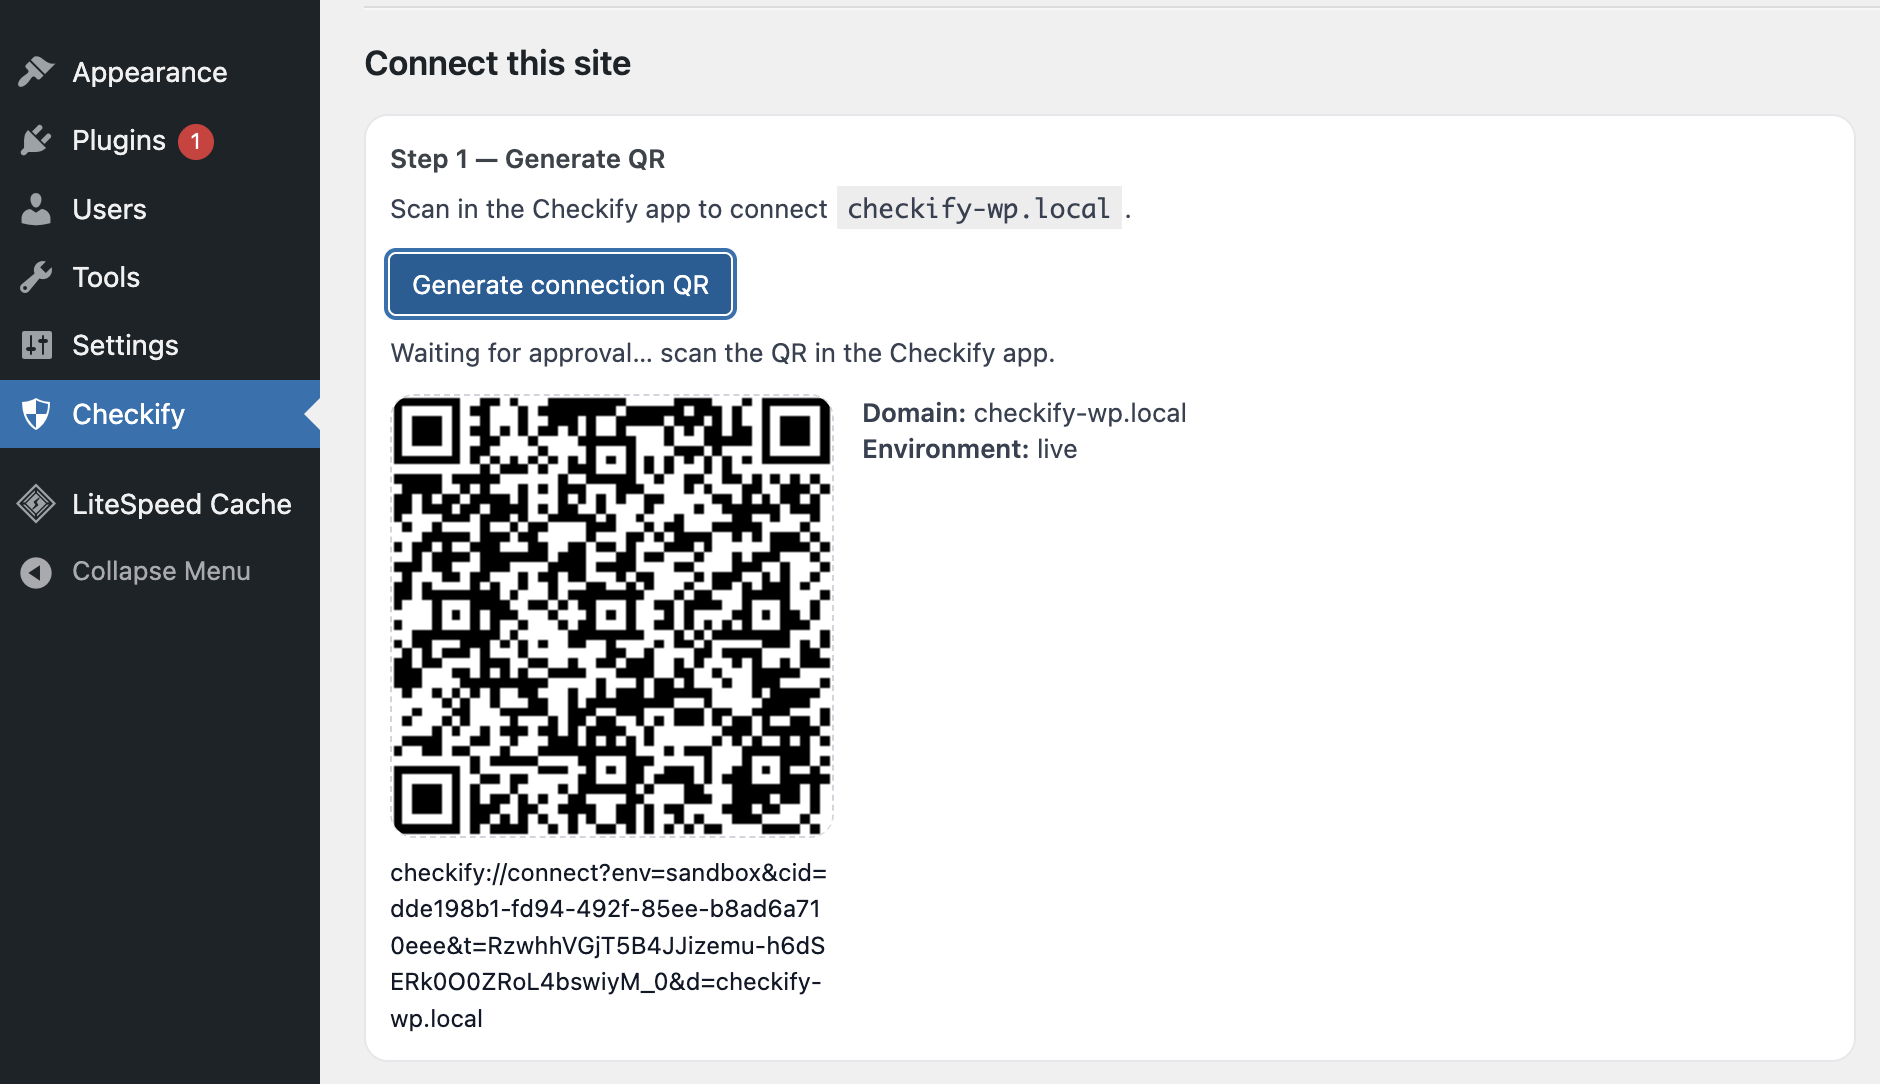
Open the Checkify plugin in WordPress and use the connect flow to link that WordPress installation to the site you created in Checkify.
This creates the trusted relationship that allows WordPress to start verification requests securely.
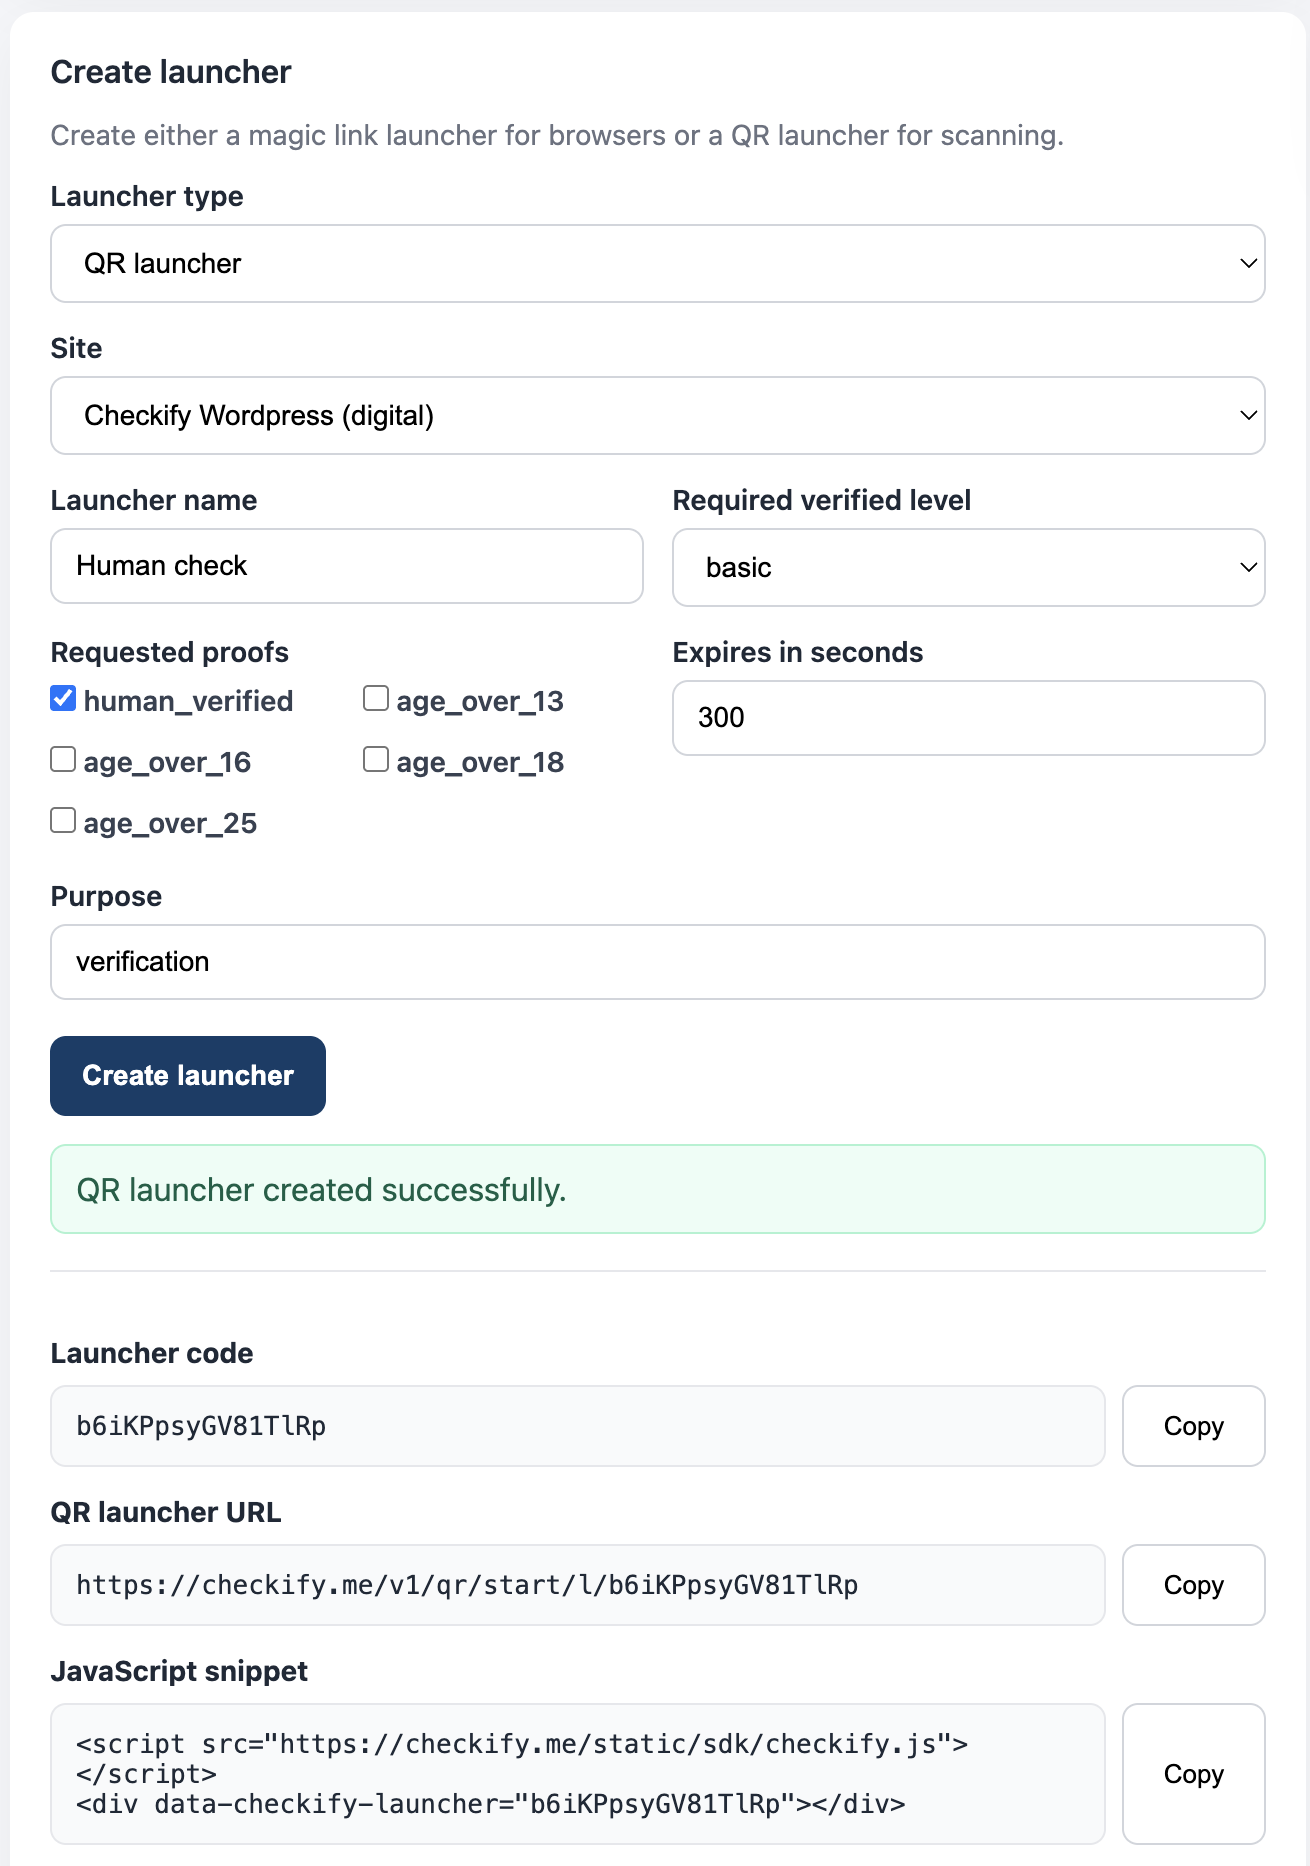
When you create a digital site, Checkify provisions a Pass with request types such as human verified, age over 18, age over 21, or age over 25.
Copy the Pass ID from the app or your business dashboard — you use the same ID everywhere and only change the request type.
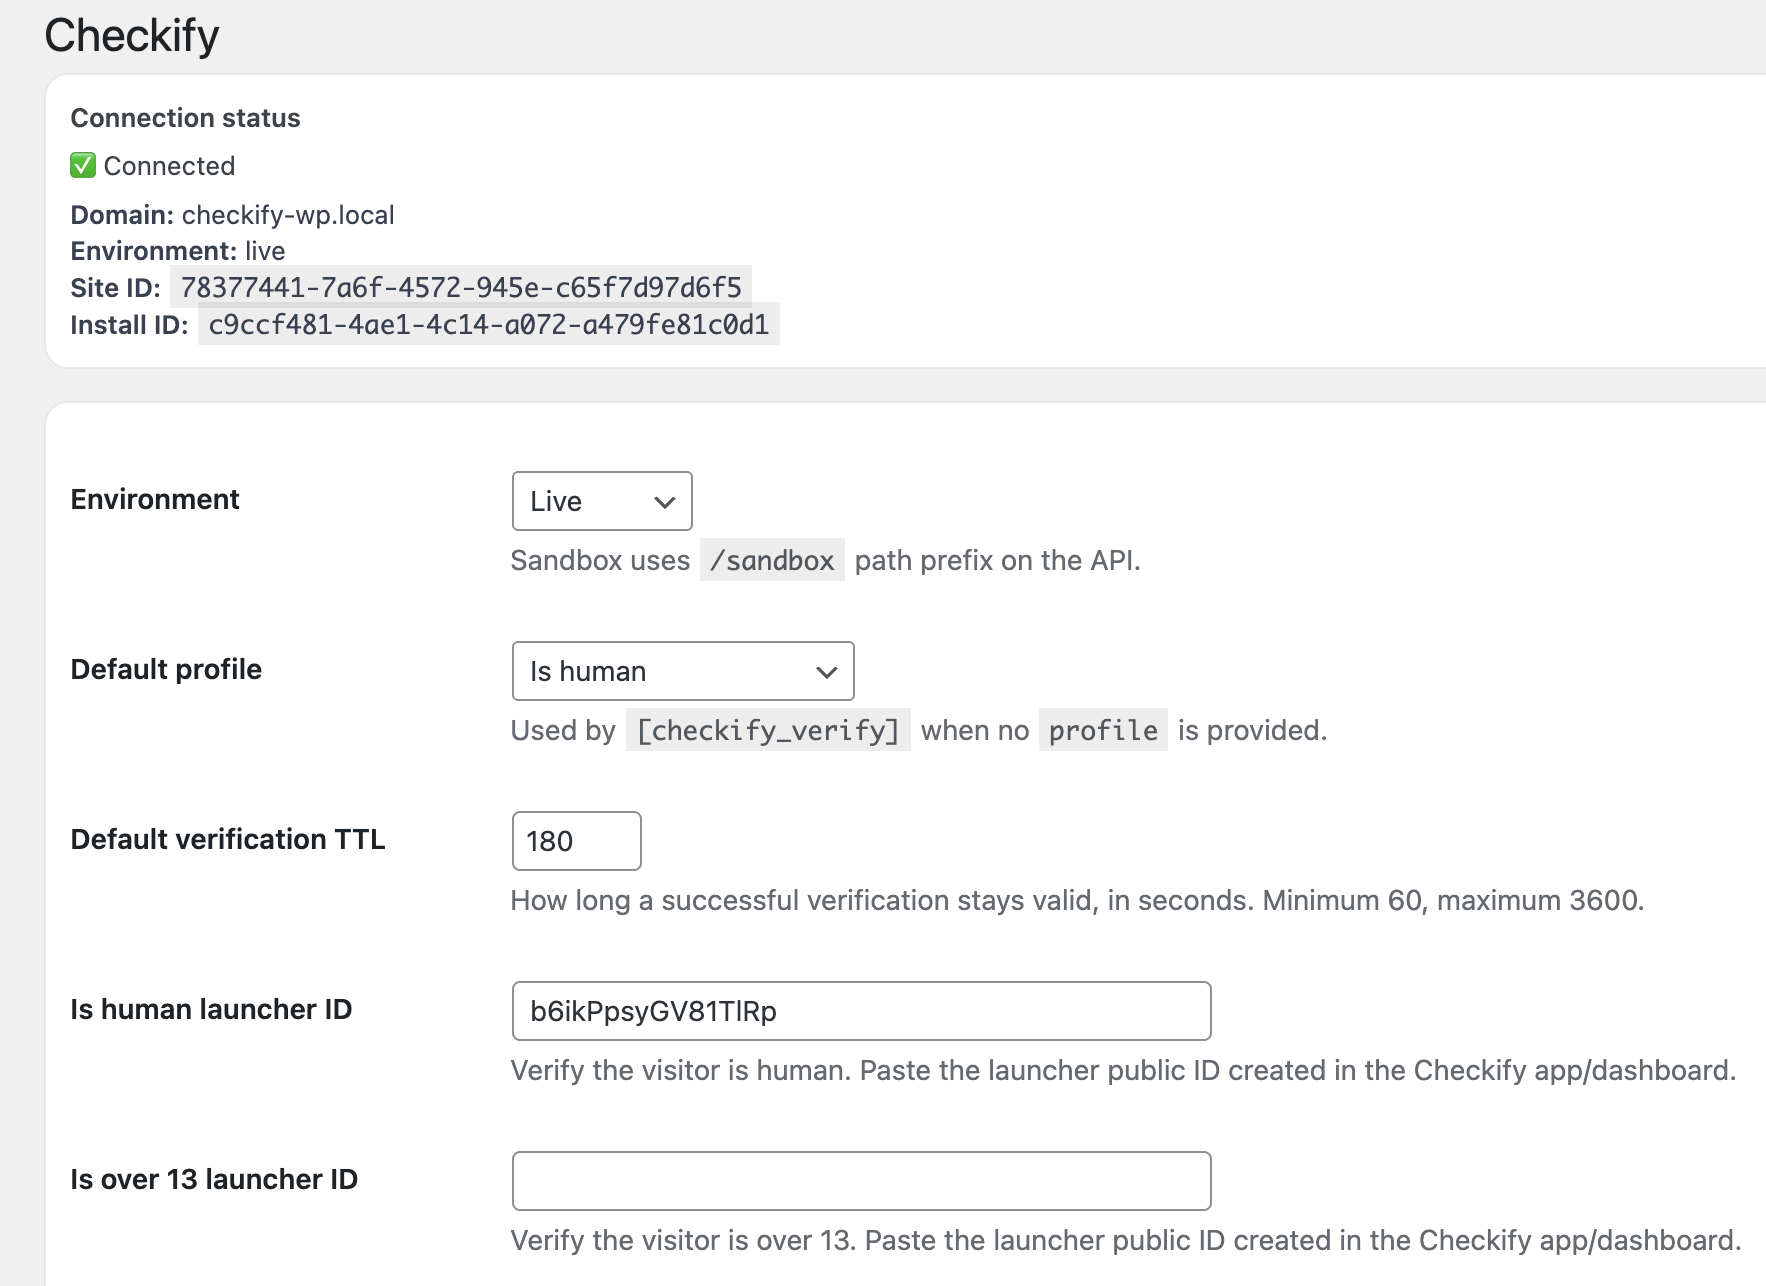
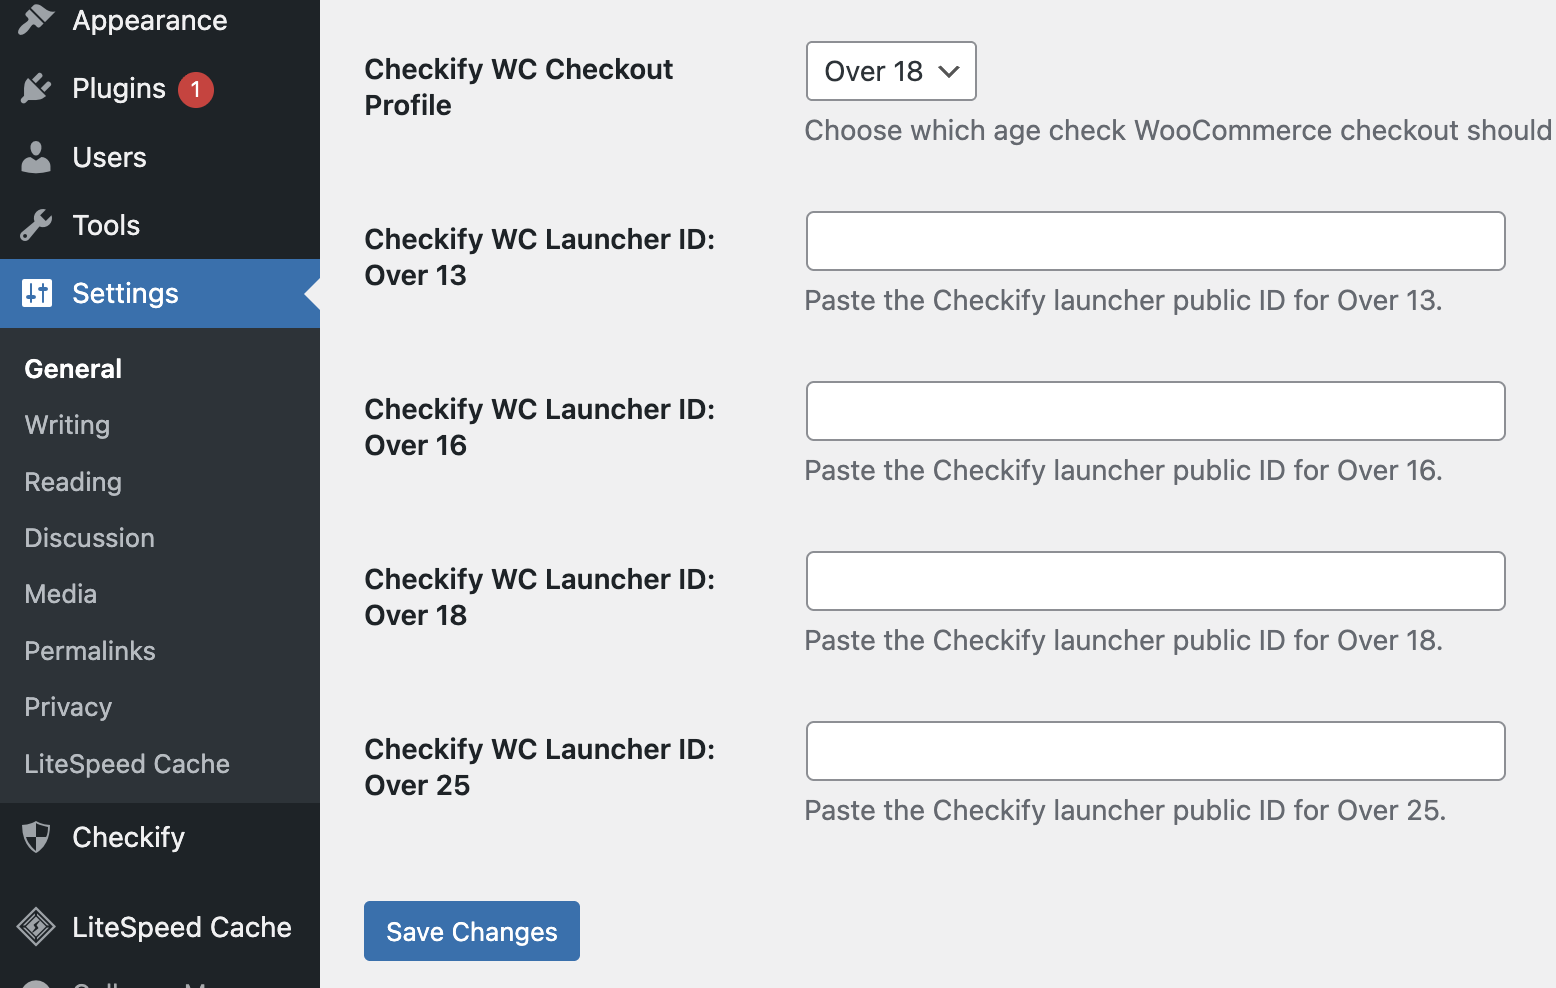
Open the Checkify connector settings in WordPress and paste your Pass ID. Satellite plugins choose a profile, which maps to a request type on that Pass.
This tells the plugin which verification flow to run for checkout, login, comments, contact forms, or shortcode-based pages.
For shortcode-based flows, paste the shortcode into the WordPress page where you want verification to appear.
Some adapters do not need a shortcode, but it is still useful for manual page-based integrations and custom flows.
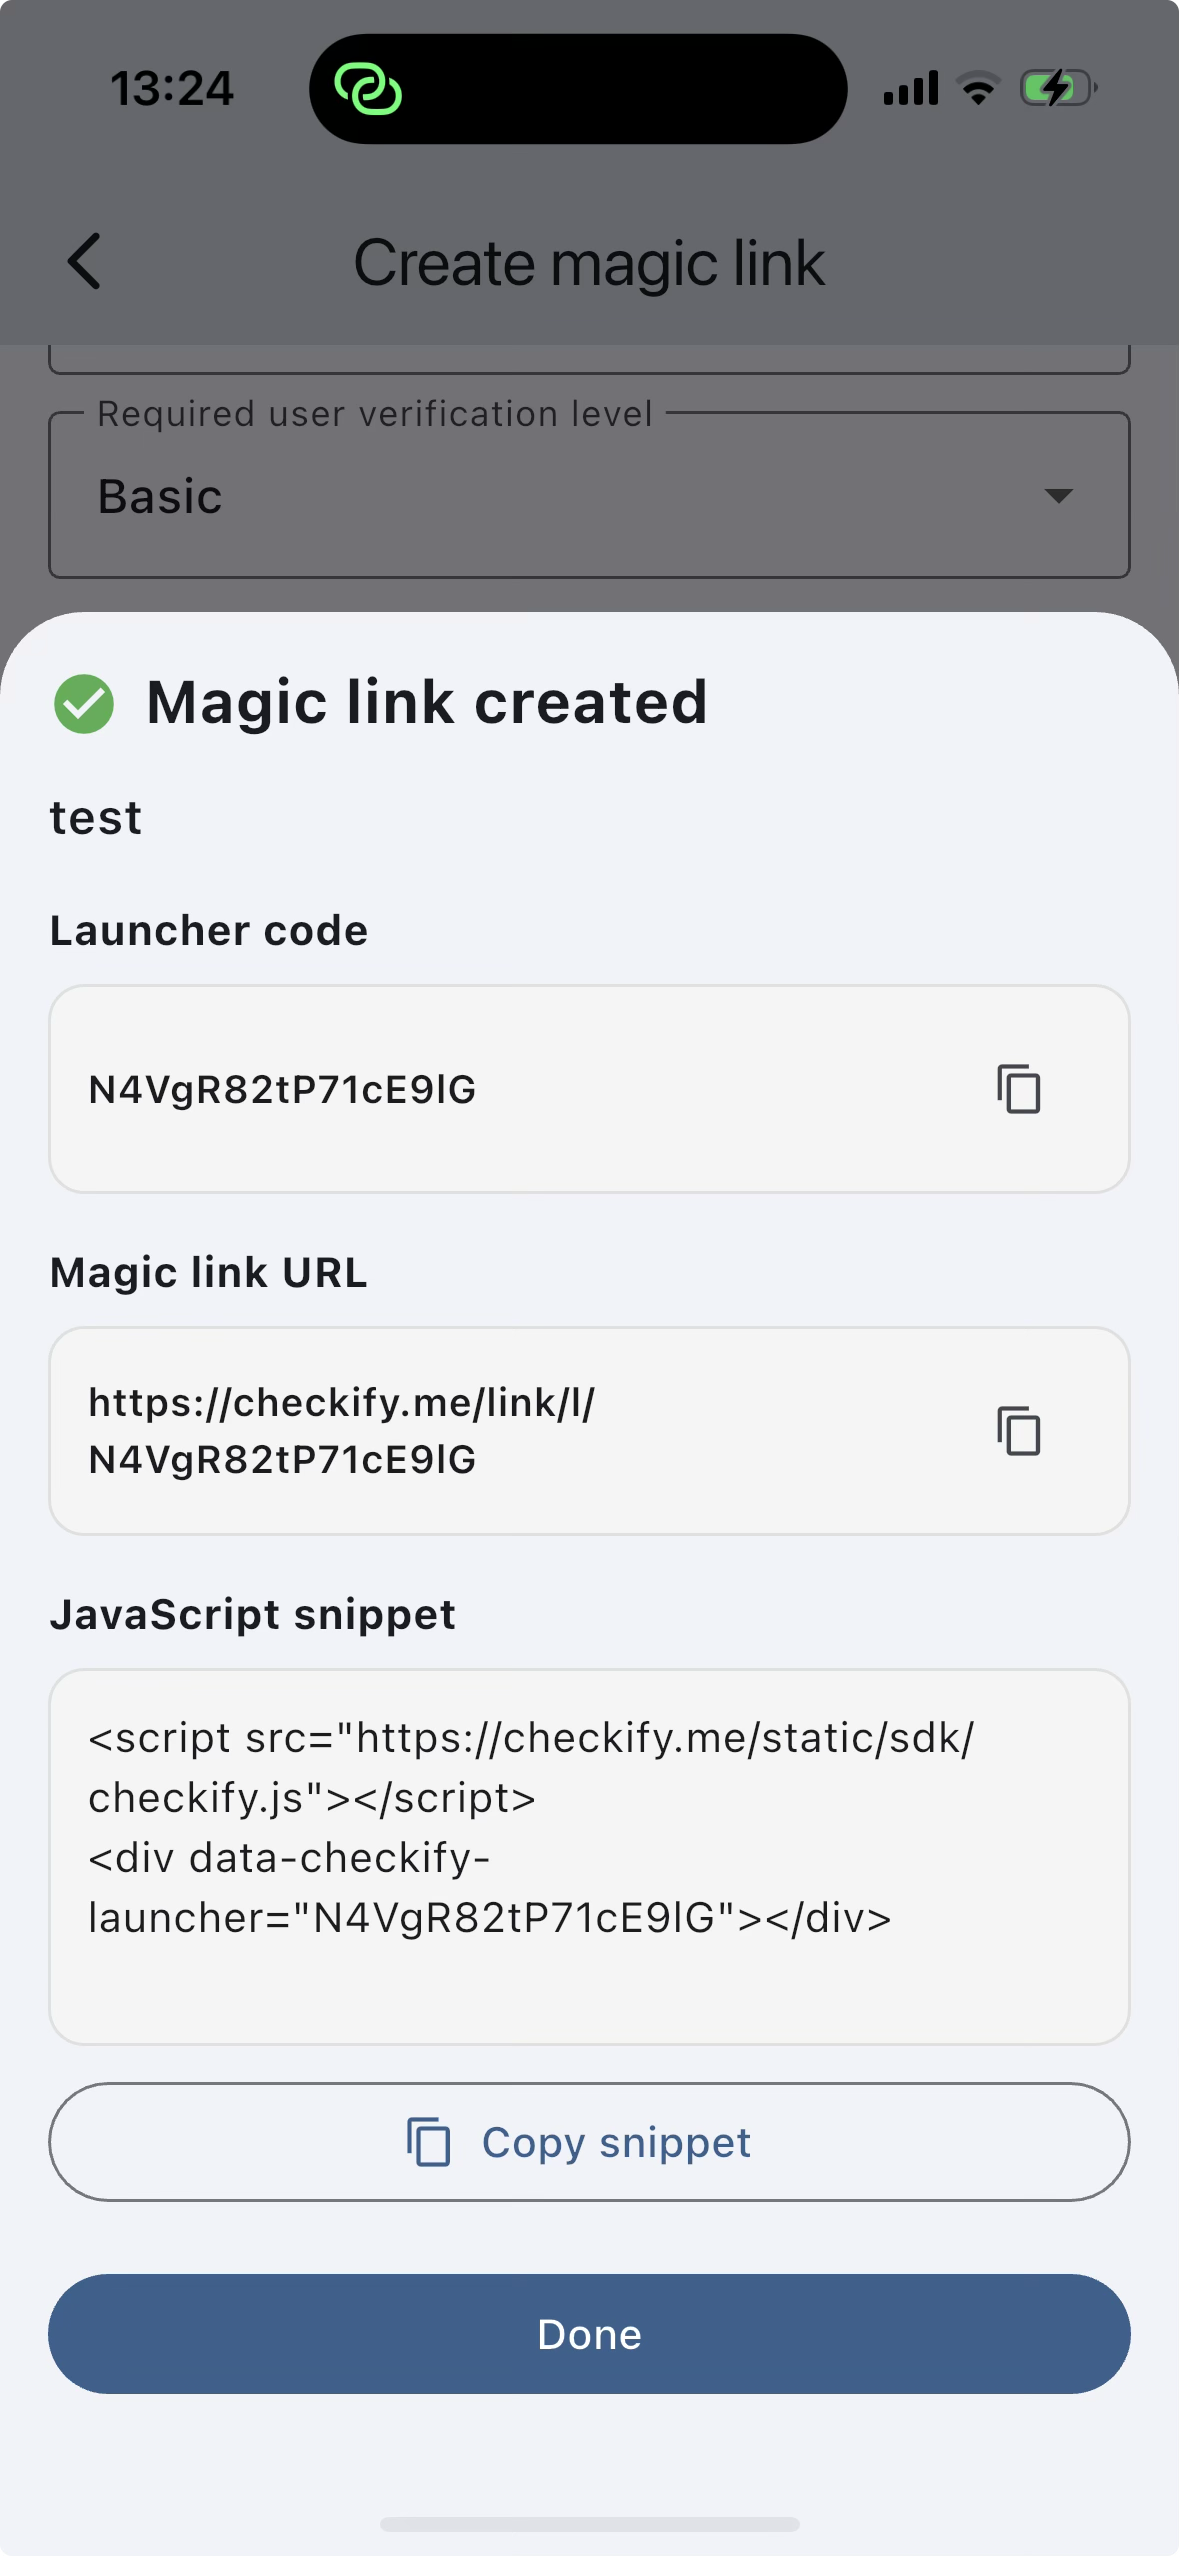
On desktop, QR is usually the simplest experience. On mobile, a magic link is often better because the user can tap straight into the Checkify app.
A polished integration can support both automatically depending on the device.
The fastest route for WooCommerce and WordPress sites is to use the Checkify plugin and adapters.
• WooCommerce checkout
• Login and registration
• Comments
• Contact forms
• Custom forms and custom selectors
1. Create your site in the app.
2. Connect to the site in WordPress.
3. Copy your Checkify Pass ID from the app or dashboard.
4. Paste the Pass ID into the Checkify connector settings.
5. Add the shortcode to a page when the flow uses shortcode-based verification.
You can also integrate Checkify into your own stack without using WordPress.
// 1. Create a digital site and copy your Checkify Pass ID
// Example: human verification

// 2. Start a Pass request from your page or backend
GET /v1/qr/pass/{pass_id}/start?request_type=human

// 3. Show the returned QR or magic link to the user

// 4. Poll the request status (proofs only — no attribute values)
GET /v1/qr/status/request/{request_id}?status_token={status_token}
// completed → approved_claims, approved_fields (names only)
// Legacy token poll GET /v1/qr/status?token={token} is deprecated for embed SDK v1.0.4+

// 5. Server-side result verification (site API key)
POST /v1/qr/results/verify

// 6. Allow or block the protected action
if (result.status === "completed") {
  // use result.approved_claims — not raw personal data
}• Custom signup flows
• Checkout flows outside WooCommerce
• Support forms or lead forms
• Review and comment systems
• Kiosk and counter experiences
You keep your own product logic and UI, while Checkify handles the proof step. That means you can add strong verification without redesigning your whole system around identity storage.
The easiest way to add Checkify to a normal form is to bind it to the form with your Pass ID and request type.
• Renders the Checkify button for you
• Stores the verification token in a hidden field
• Disables submit until verification is complete
• Works well for Flask, Django, Laravel, PHP, and WordPress-style forms
• Keeps your backend simple because you only verify the returned token
• Password reset forms
• Signup and login forms
• Contact forms
• Checkout protection
• Comment and review submission
<form id="reset-form">
  <input type="email" name="email">
  <input type="hidden" id="checkify_token" name="checkify_token">
  <div id="checkify-button-wrap"></div>
  <button id="send" type="button">Send</button>
</form>

<script src="https://checkify.me/sdk/v1/checkify.min.js"></script>
<script>
  Checkify.bindForm('#reset-form', {
    passId: 'YOUR_PASS_ID',
    requestType: 'human',
    buttonTarget: '#checkify-button-wrap',
    submitButton: '#send',
    hiddenInput: '#checkify_token'
  });
</script>1. Create a digital site and copy your Checkify Pass ID.
2. Add the Checkify SDK script to your page.
3. Call Checkify.bindForm(...) with your Pass ID and request type.
4. Let Checkify write the token into a hidden field.
5. Send that token to your backend and verify it server-side before allowing the action.
Instead of wiring up button rendering, token handling, and submit state yourself, the SDK handles the form plumbing for you. Your integration becomes: add a Pass ID, bind the form, then verify the returned token on your backend.
<form data-checkify-pass="YOUR_PASS_ID" data-checkify-request="human">
  ...
</form>
For standard forms, you can also use auto-enhance mode with data-checkify-pass and data-checkify-request.
The browser only gives you a token. Your server should always verify that token with Checkify before allowing password reset, signup, checkout, comment submission, or any other protected action.
Start with one protected action, then expand across your product.
Use human verification instead of traditional CAPTCHA for login, comments, reviews, and contact forms.
Restrict content, products, or services based on over 13, over 16, over 18, or over 25 checks.
Add stronger proof to account recovery, admin actions, payouts, or approvals.
Once integrated, the same pattern can be reused across plugins, forms, apps, and websites.
Start by connecting your site, copying your Checkify Pass ID, and protecting one key user action.