ビジネスを登録し、検証レベルを上げ、ユーザーが信頼を証明する必要があるサイト用に Checkify Passes を作成します。
Every new business receives 100 free credits when you register. Use them for verifications before you need to buy more or enable overflow billing.
By selecting overflow billing, you will only be charged once your free 100 credits have been used up. You can cancel your subscription at any time.
Install the Checkify app, create your identity, then follow these steps in Settings. The same business account also works on checkify.me.
ステップ 1
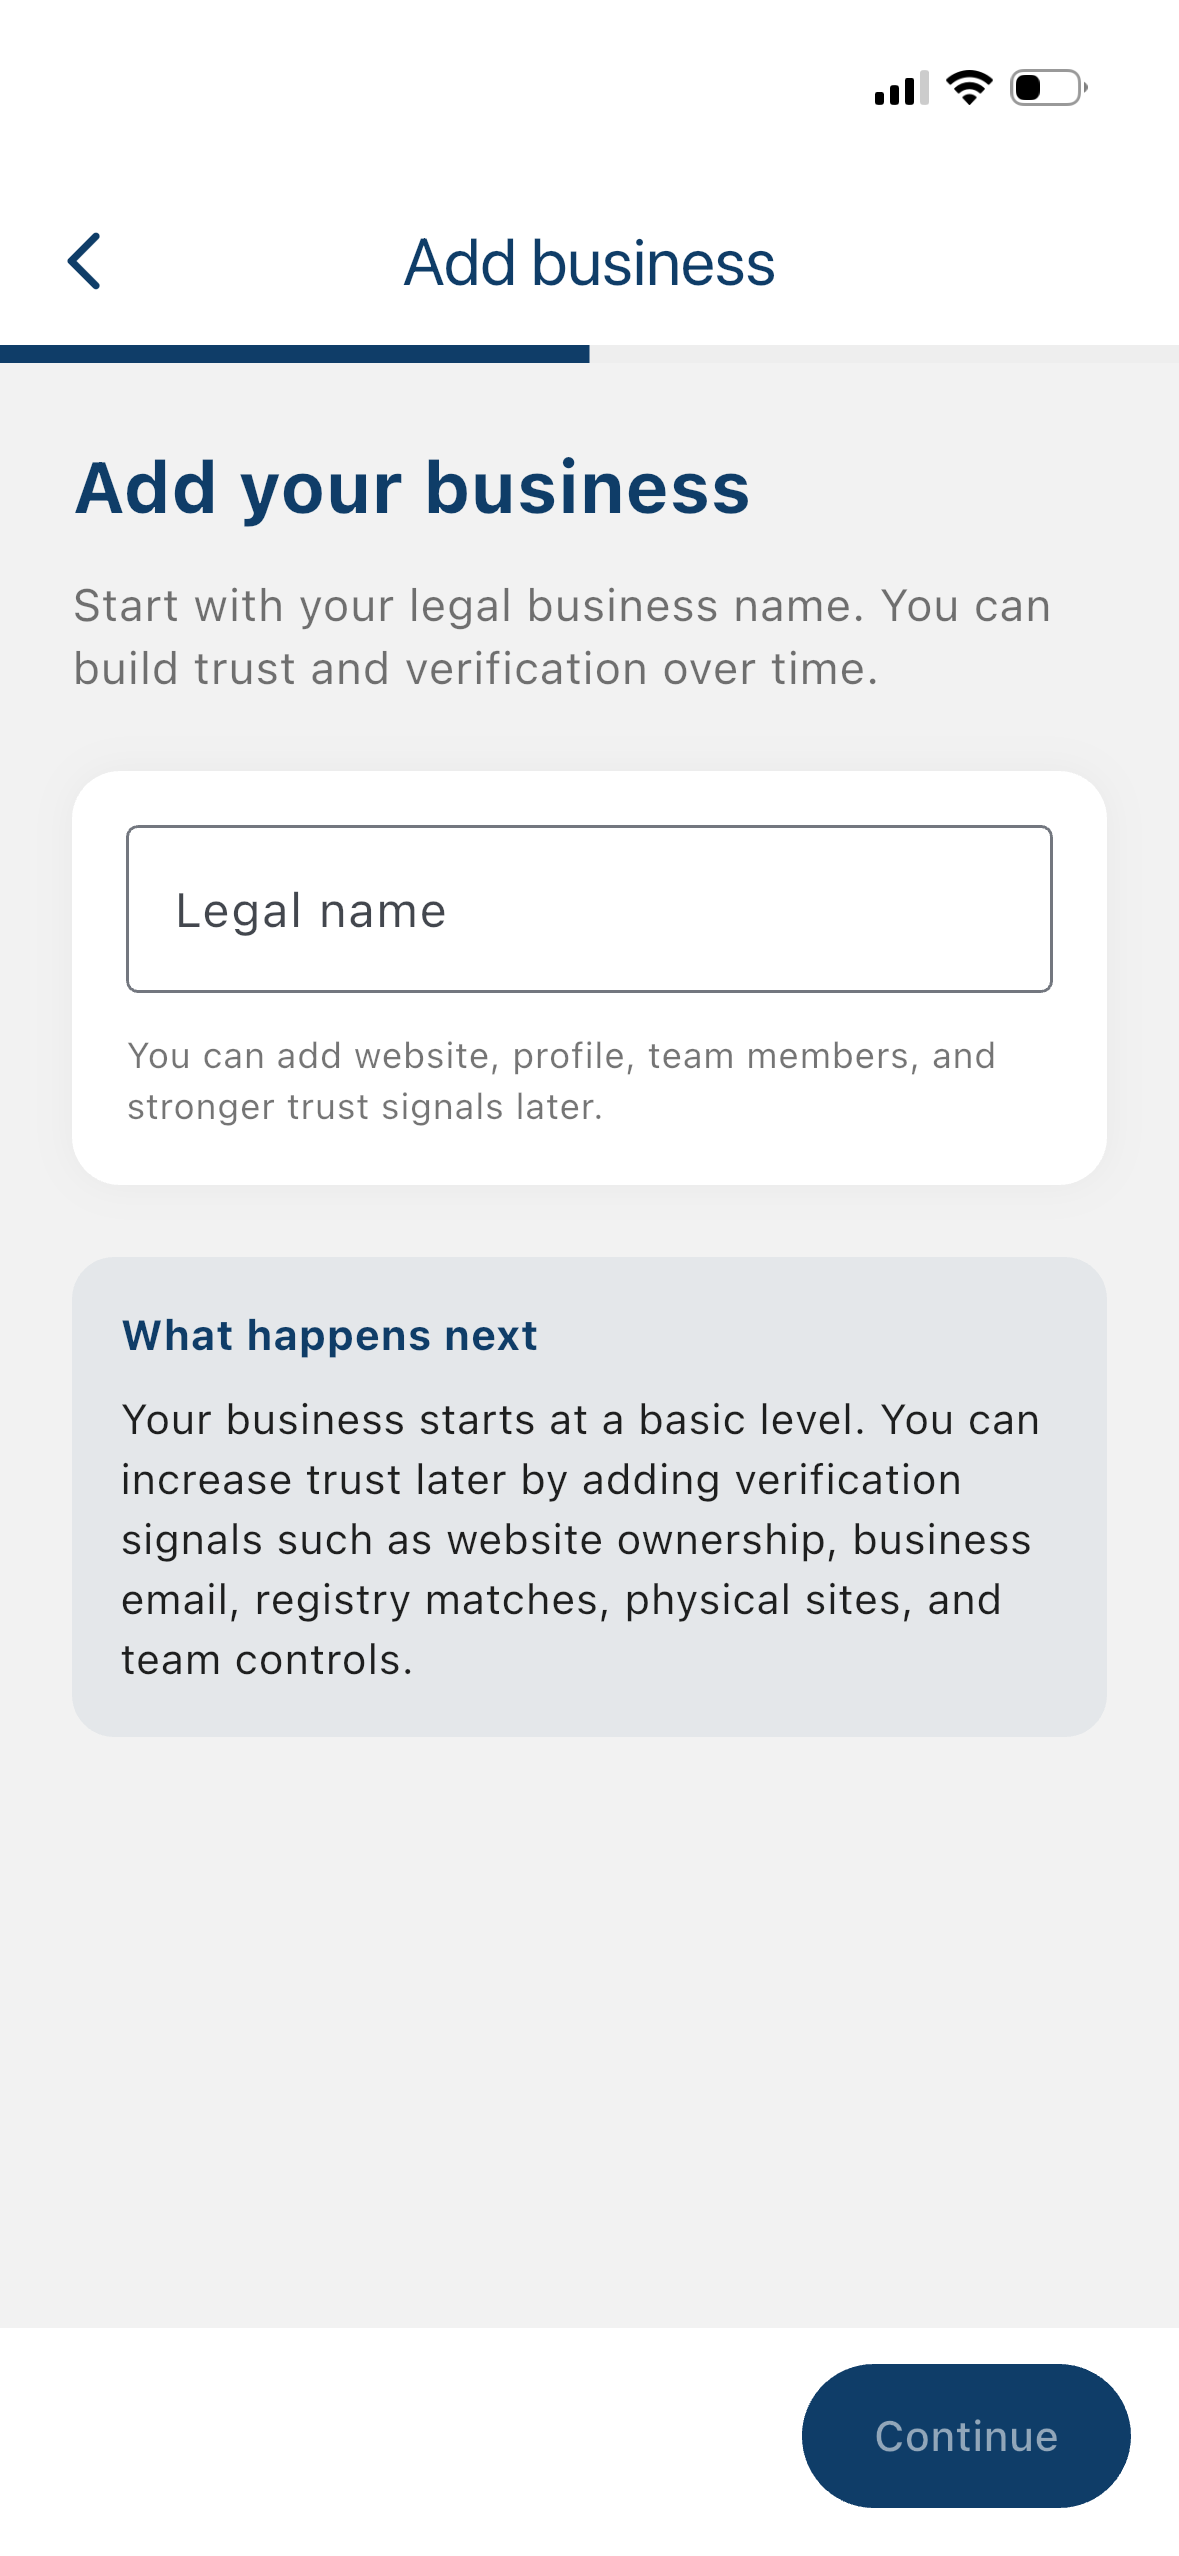
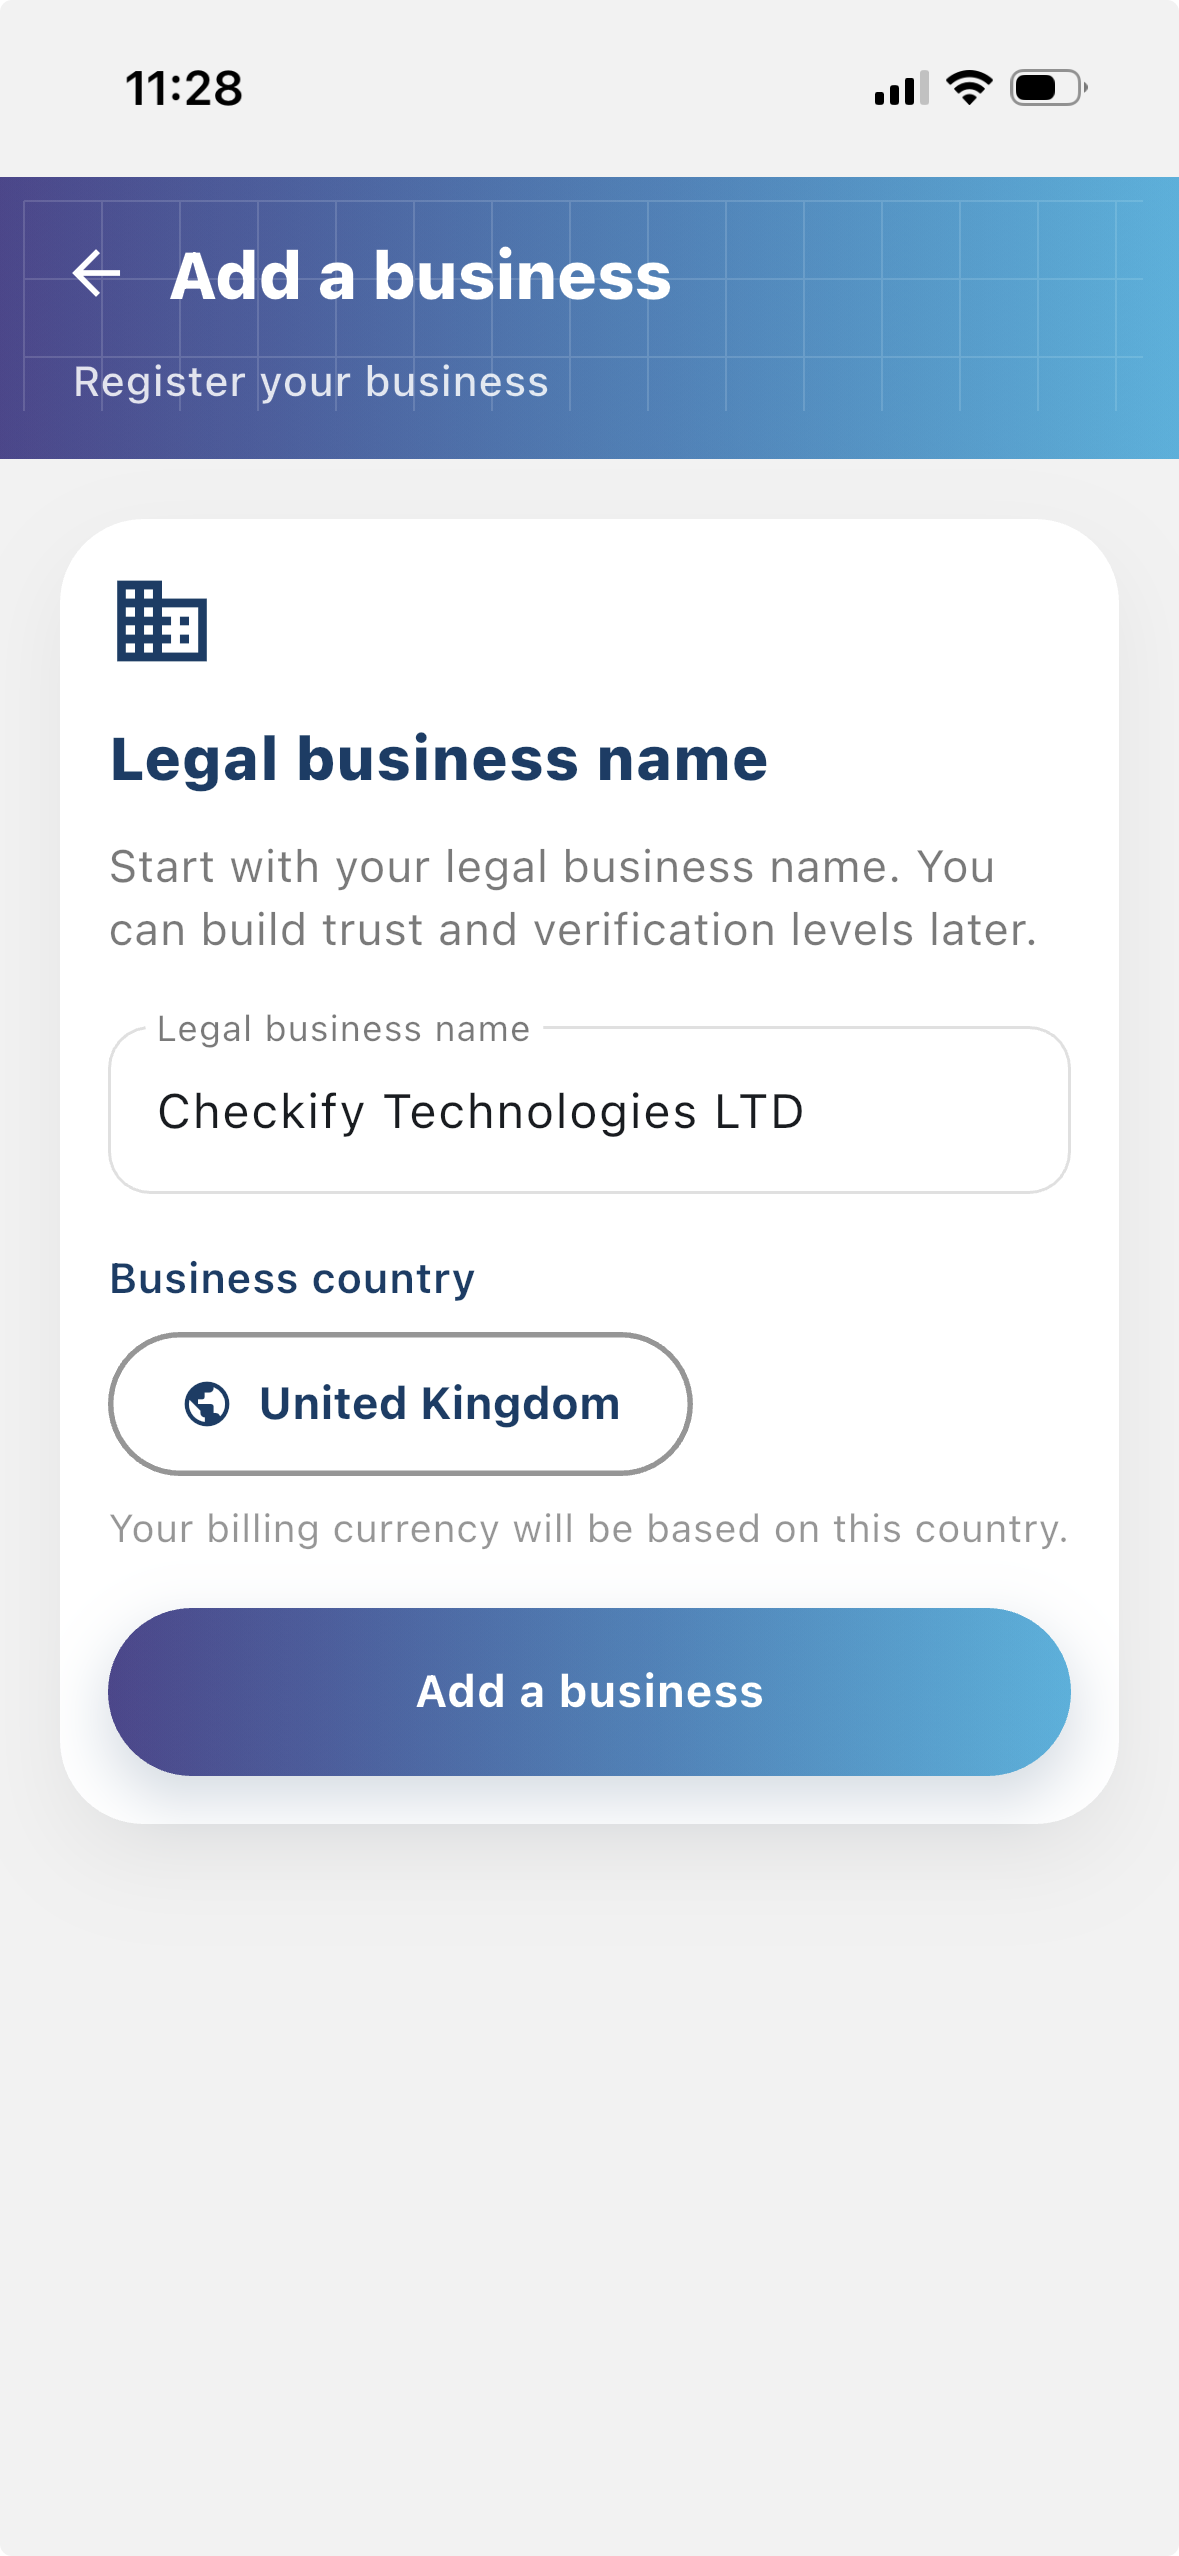
ビジネスを登録すると、誰が認証をリクエストしているのかをユーザーが確認できるようになります。ビジネスを登録すると、Checkify フローにより多くのコンテキストが提供され、ユーザーとの信頼関係の構築に役立ちます。
ステップ 2
サイトとは、Checkify Passes が作成および使用される場所です。これは、Web サイト、アプリ、チェックアウト フロー、予約フロー、物理的な会場、受付デスク、カウンター、またはその他の現実世界の場所です。
ステップ 3
A Checkify Pass は、サイトに対して作成する証明リクエストです。人間による確認、18 歳以上、または特定のアクションの承認など、ユーザーに証明してもらいたいことを定義します。
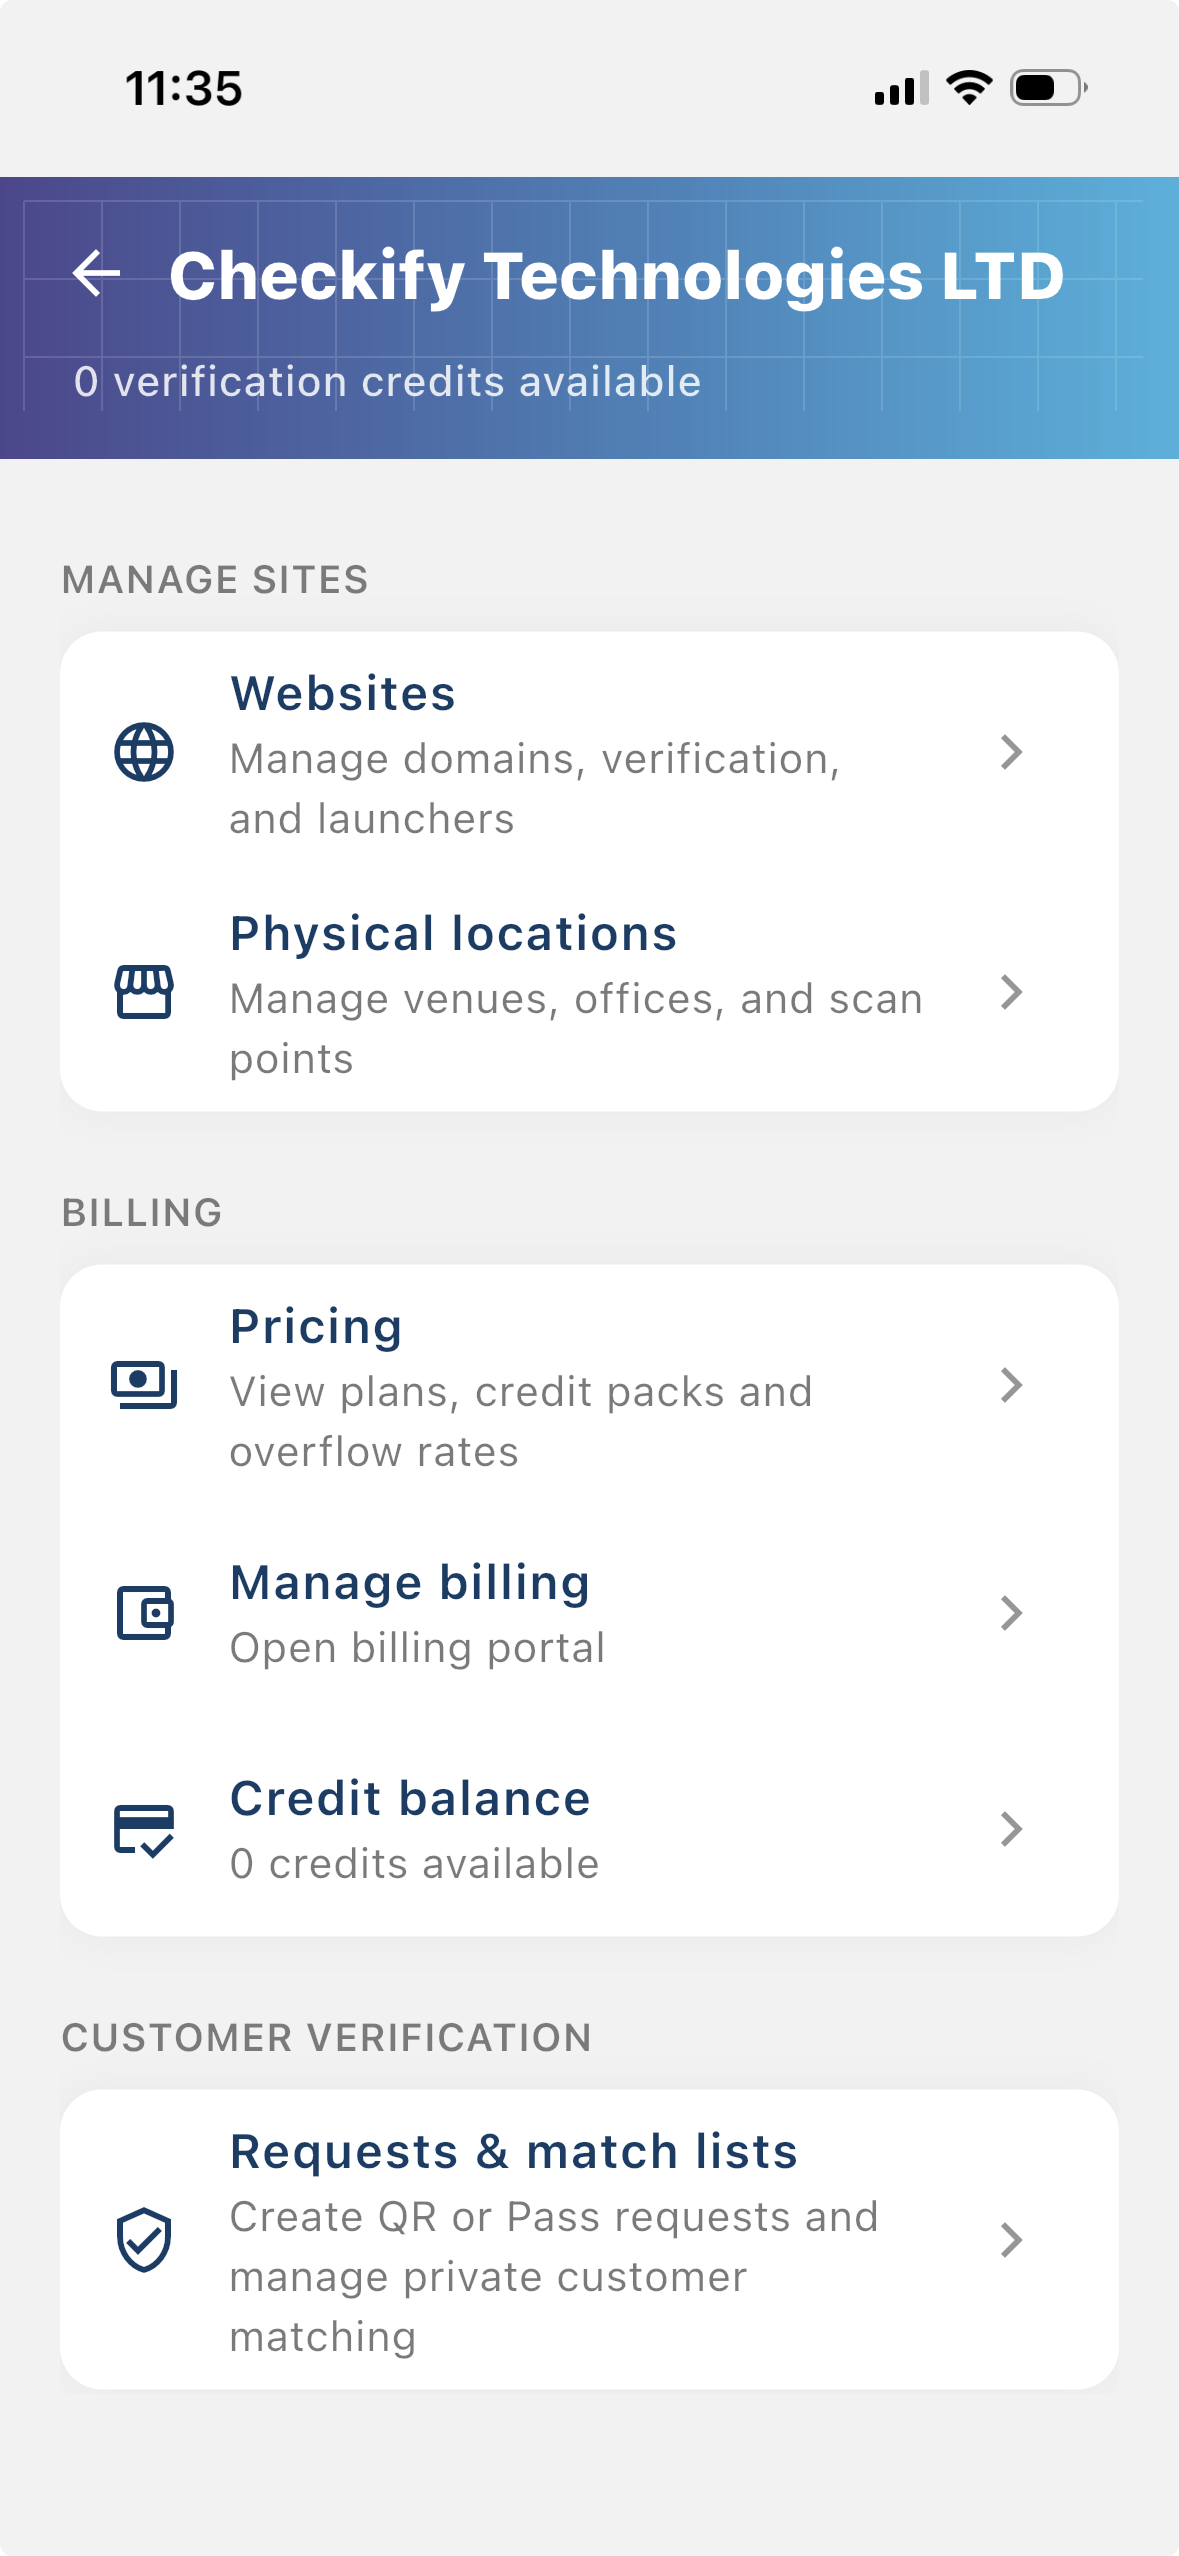
From the business menu you can:
ステップ 4
Go to Settings → Manage sites. Here you add websites, apps, or physical locations where Checkify Passes will be used.
ステップ 5
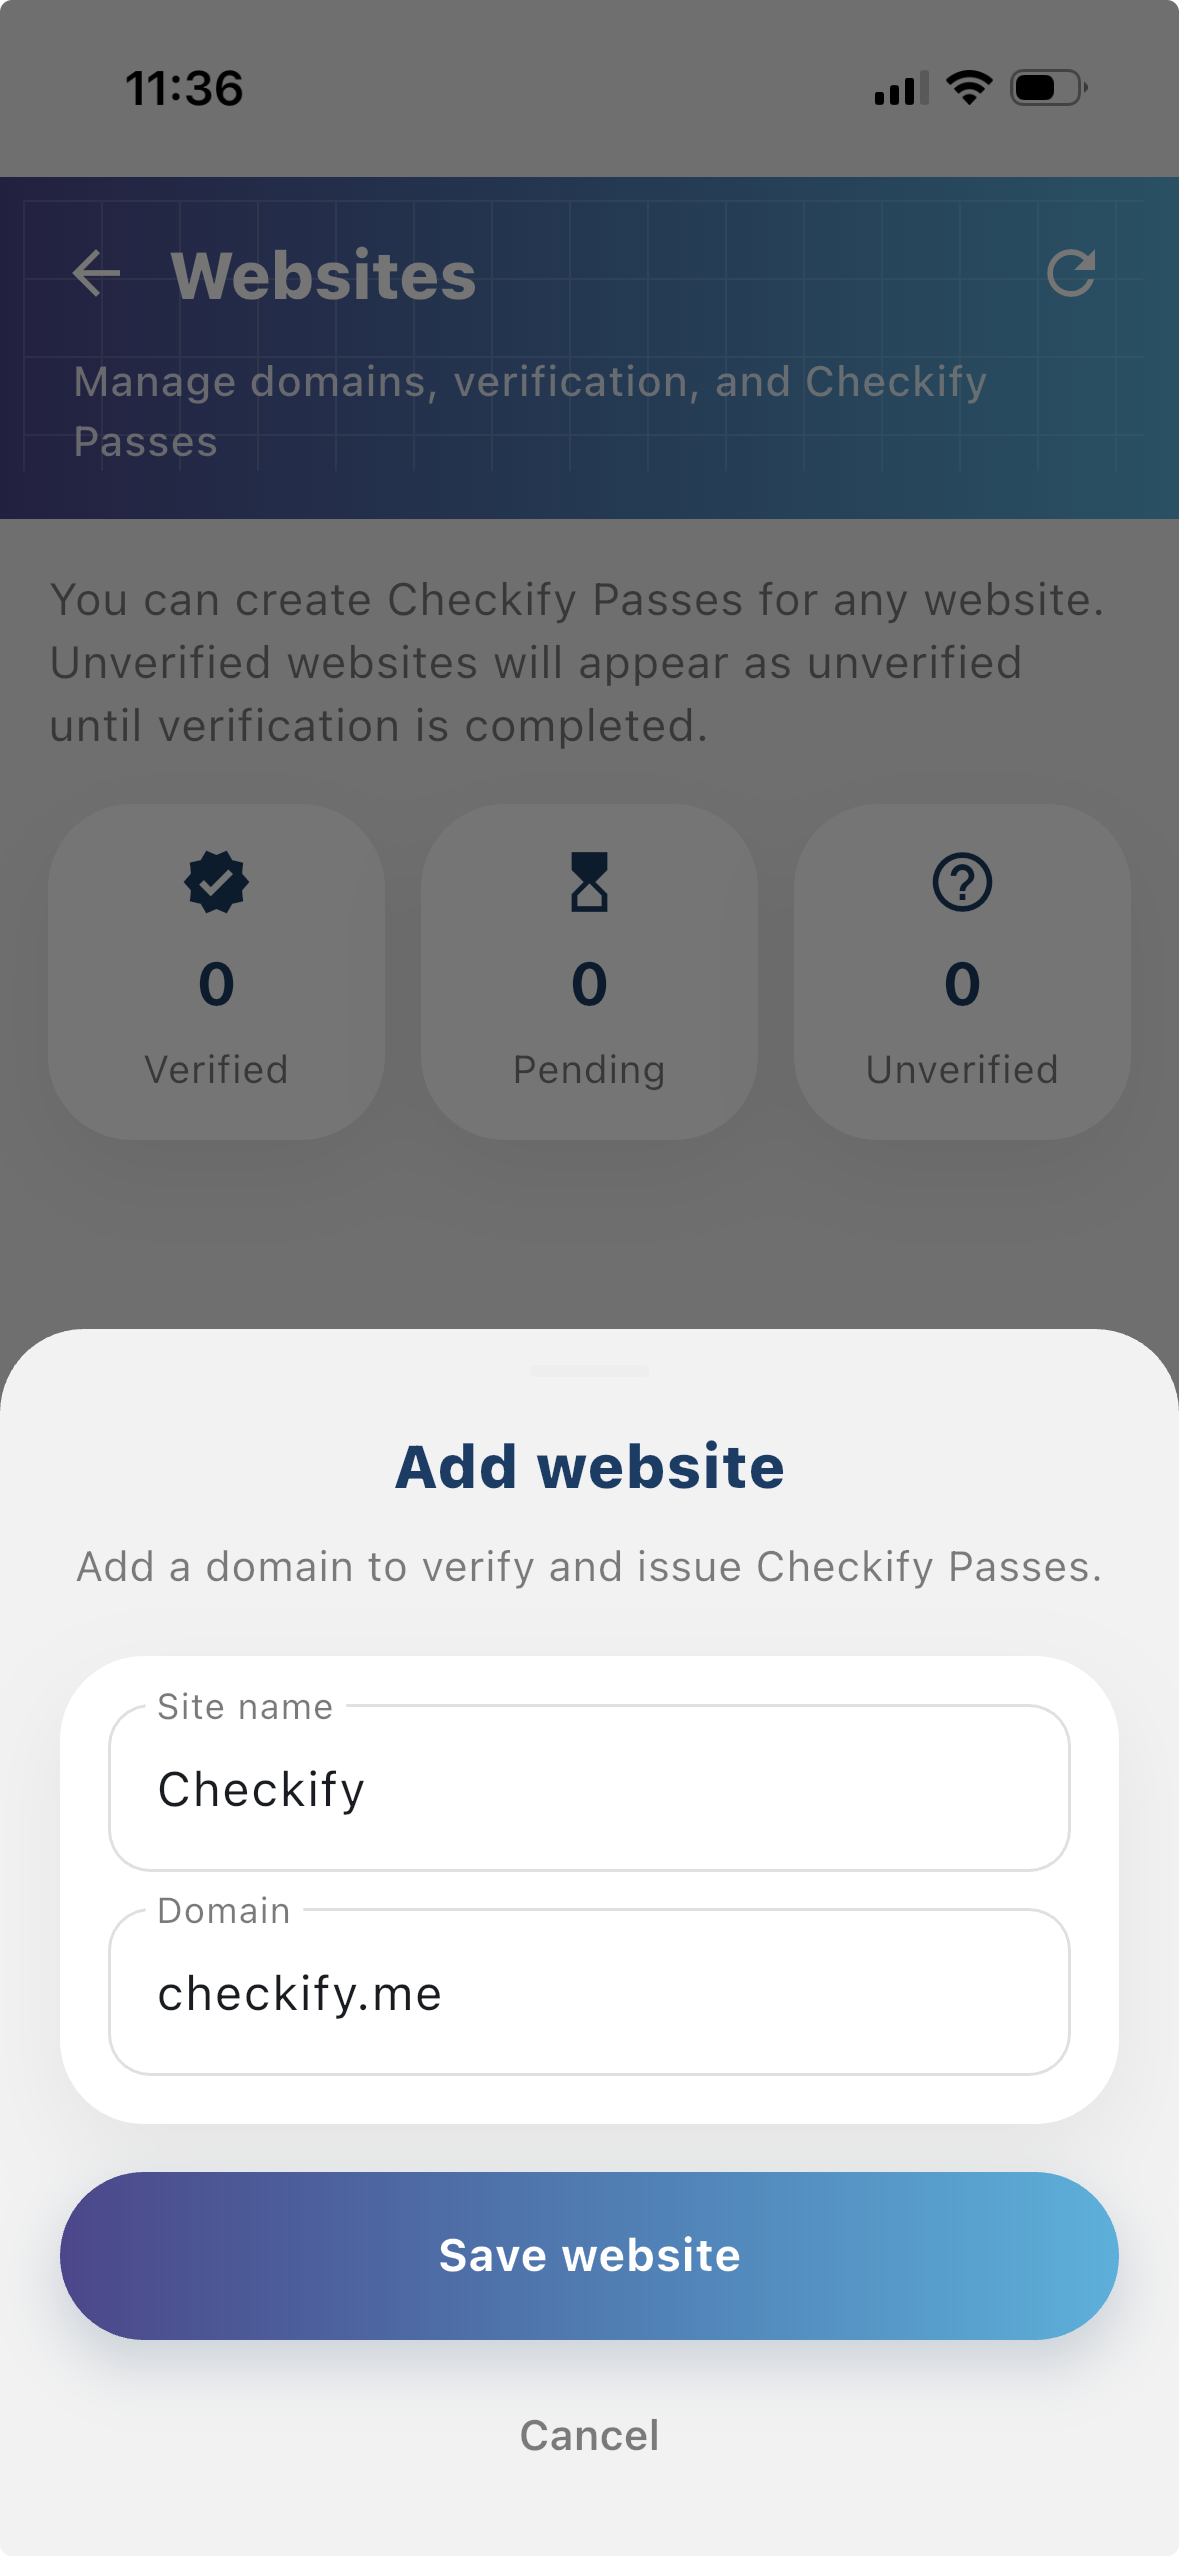
Tap to add a website or physical location. Checkify auto-provisions one Pass per site. If this is your first site, choose overflow billing and save a card when prompted — you are only charged after your free 100 credits are used up.
New businesses get 100 free credits on sign-up. These are applied automatically when your business is created.
By selecting overflow billing, you will only be charged once your free 100 credits have been used up. You can cancel your subscription at any time.
You can also register at checkify.me, sign in with the app, and manage sites from the business dashboard. The app setup above is the fastest path for most teams.
Register on checkify.me →1 つのサイト、1 つの校正リクエスト、1 つのビジネス フローから始めます。その後、成長に合わせてビジネスの信頼レベルを上げてください。