Register a business, increase your verification level, and create Checkify Passes for the sites where your users need to prove trust.
Every new business receives 100 free credits when you register. Use them for verifications before you need to buy more or enable overflow billing.
By selecting overflow billing, you will only be charged once your free 100 credits have been used up. You can cancel your subscription at any time.
Install the Checkify app, create your identity, then follow these steps in Settings. The same business account also works on checkify.me.
Step 1
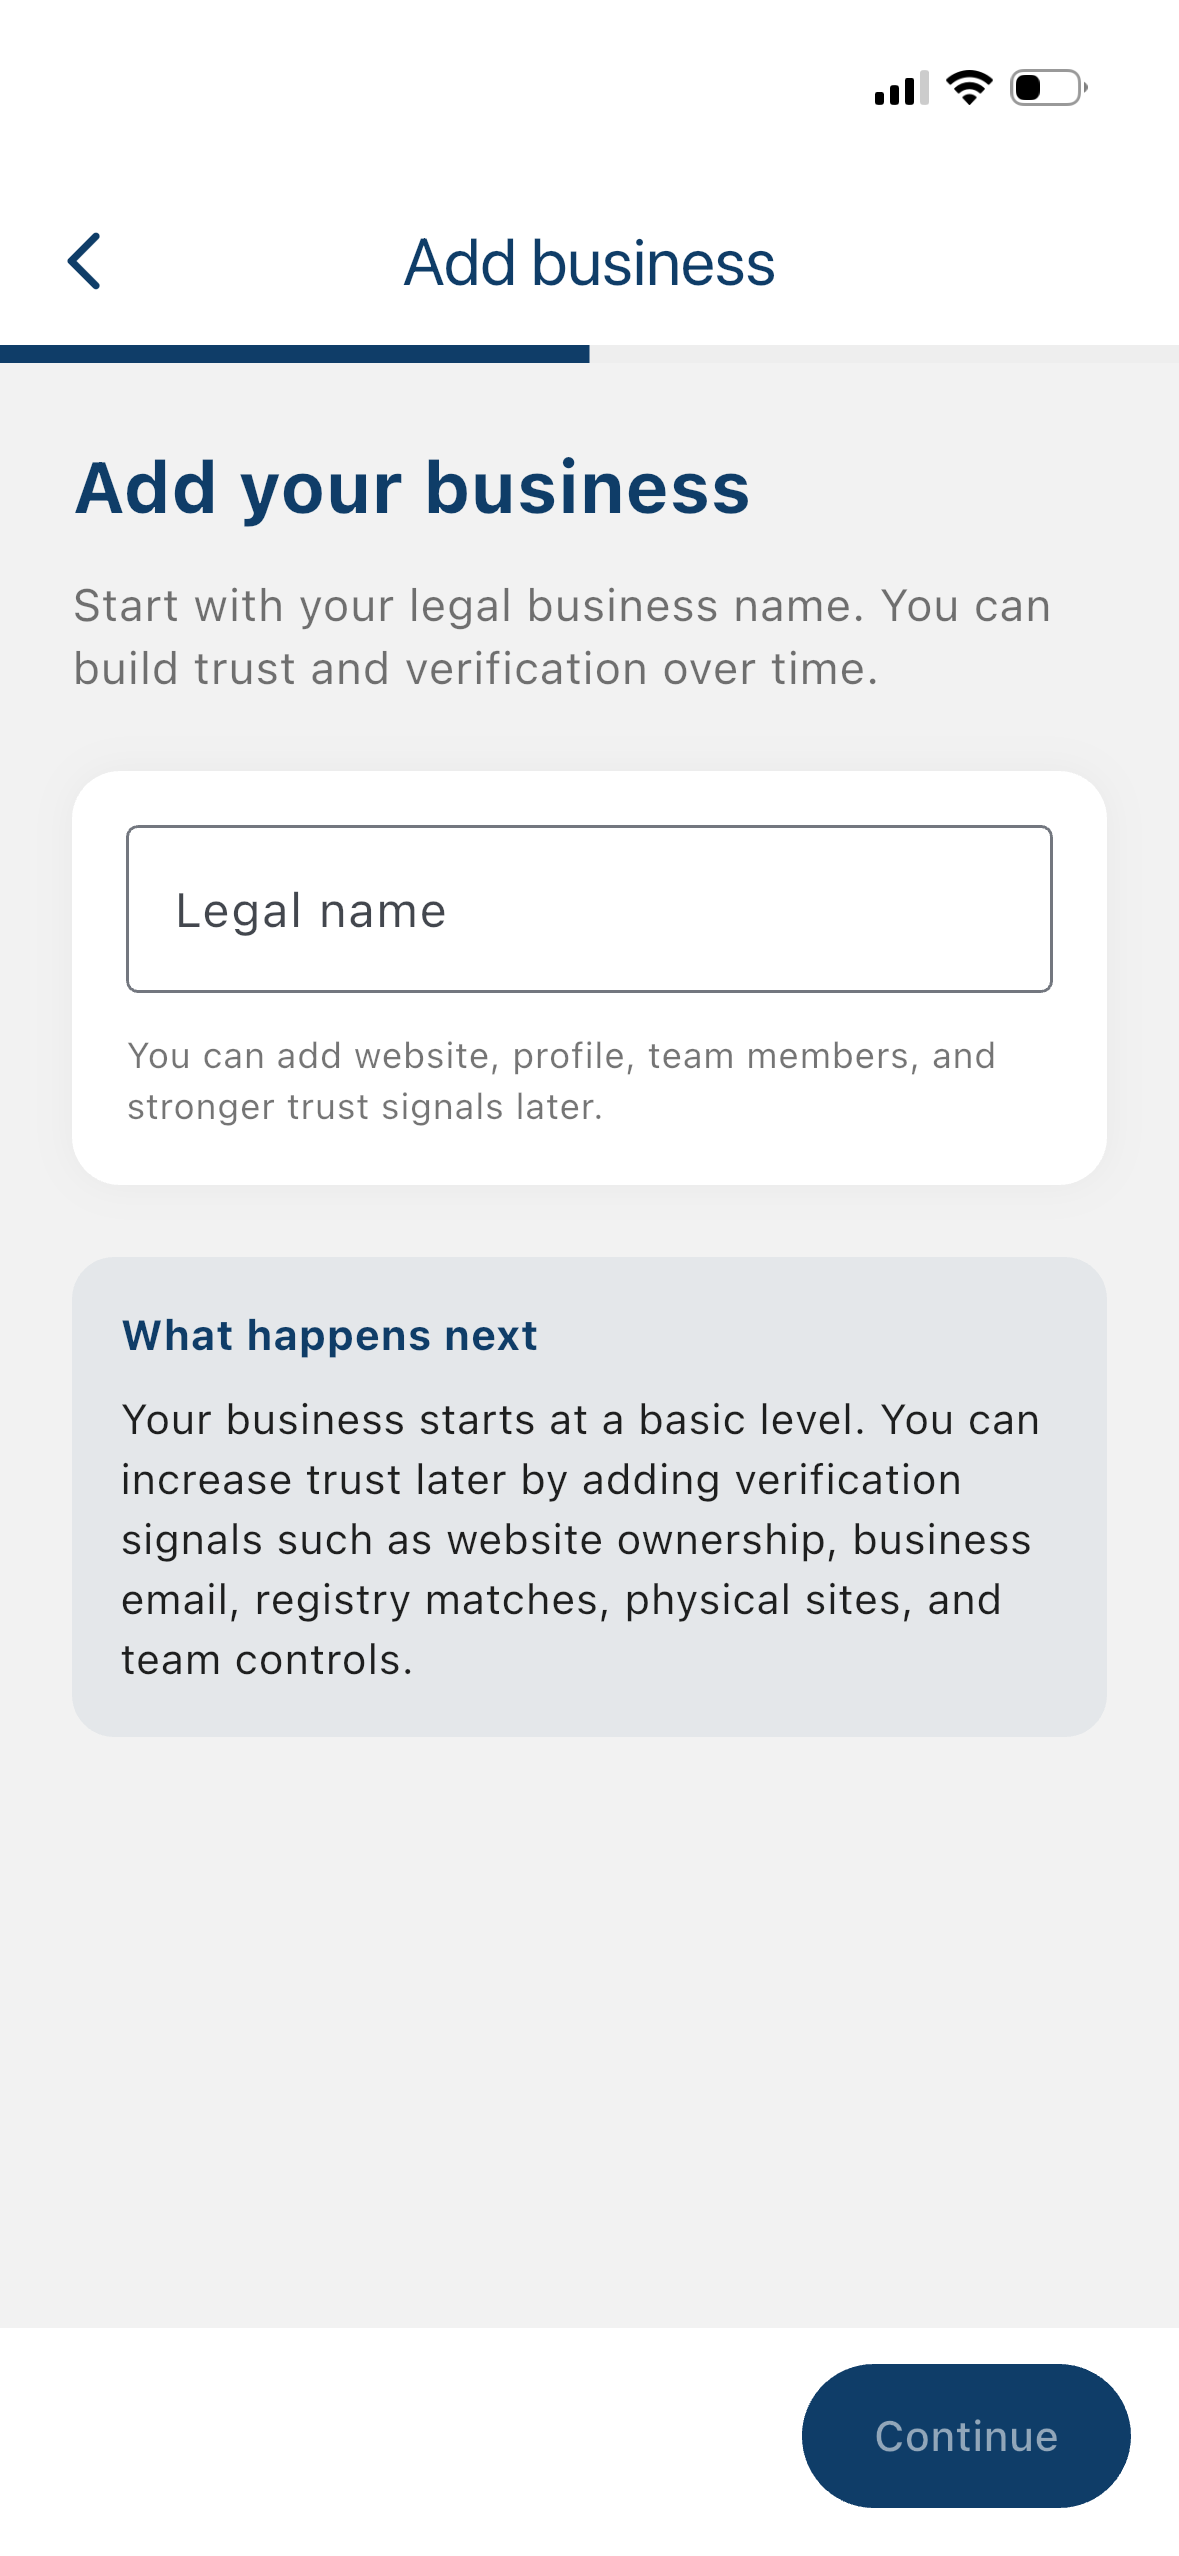
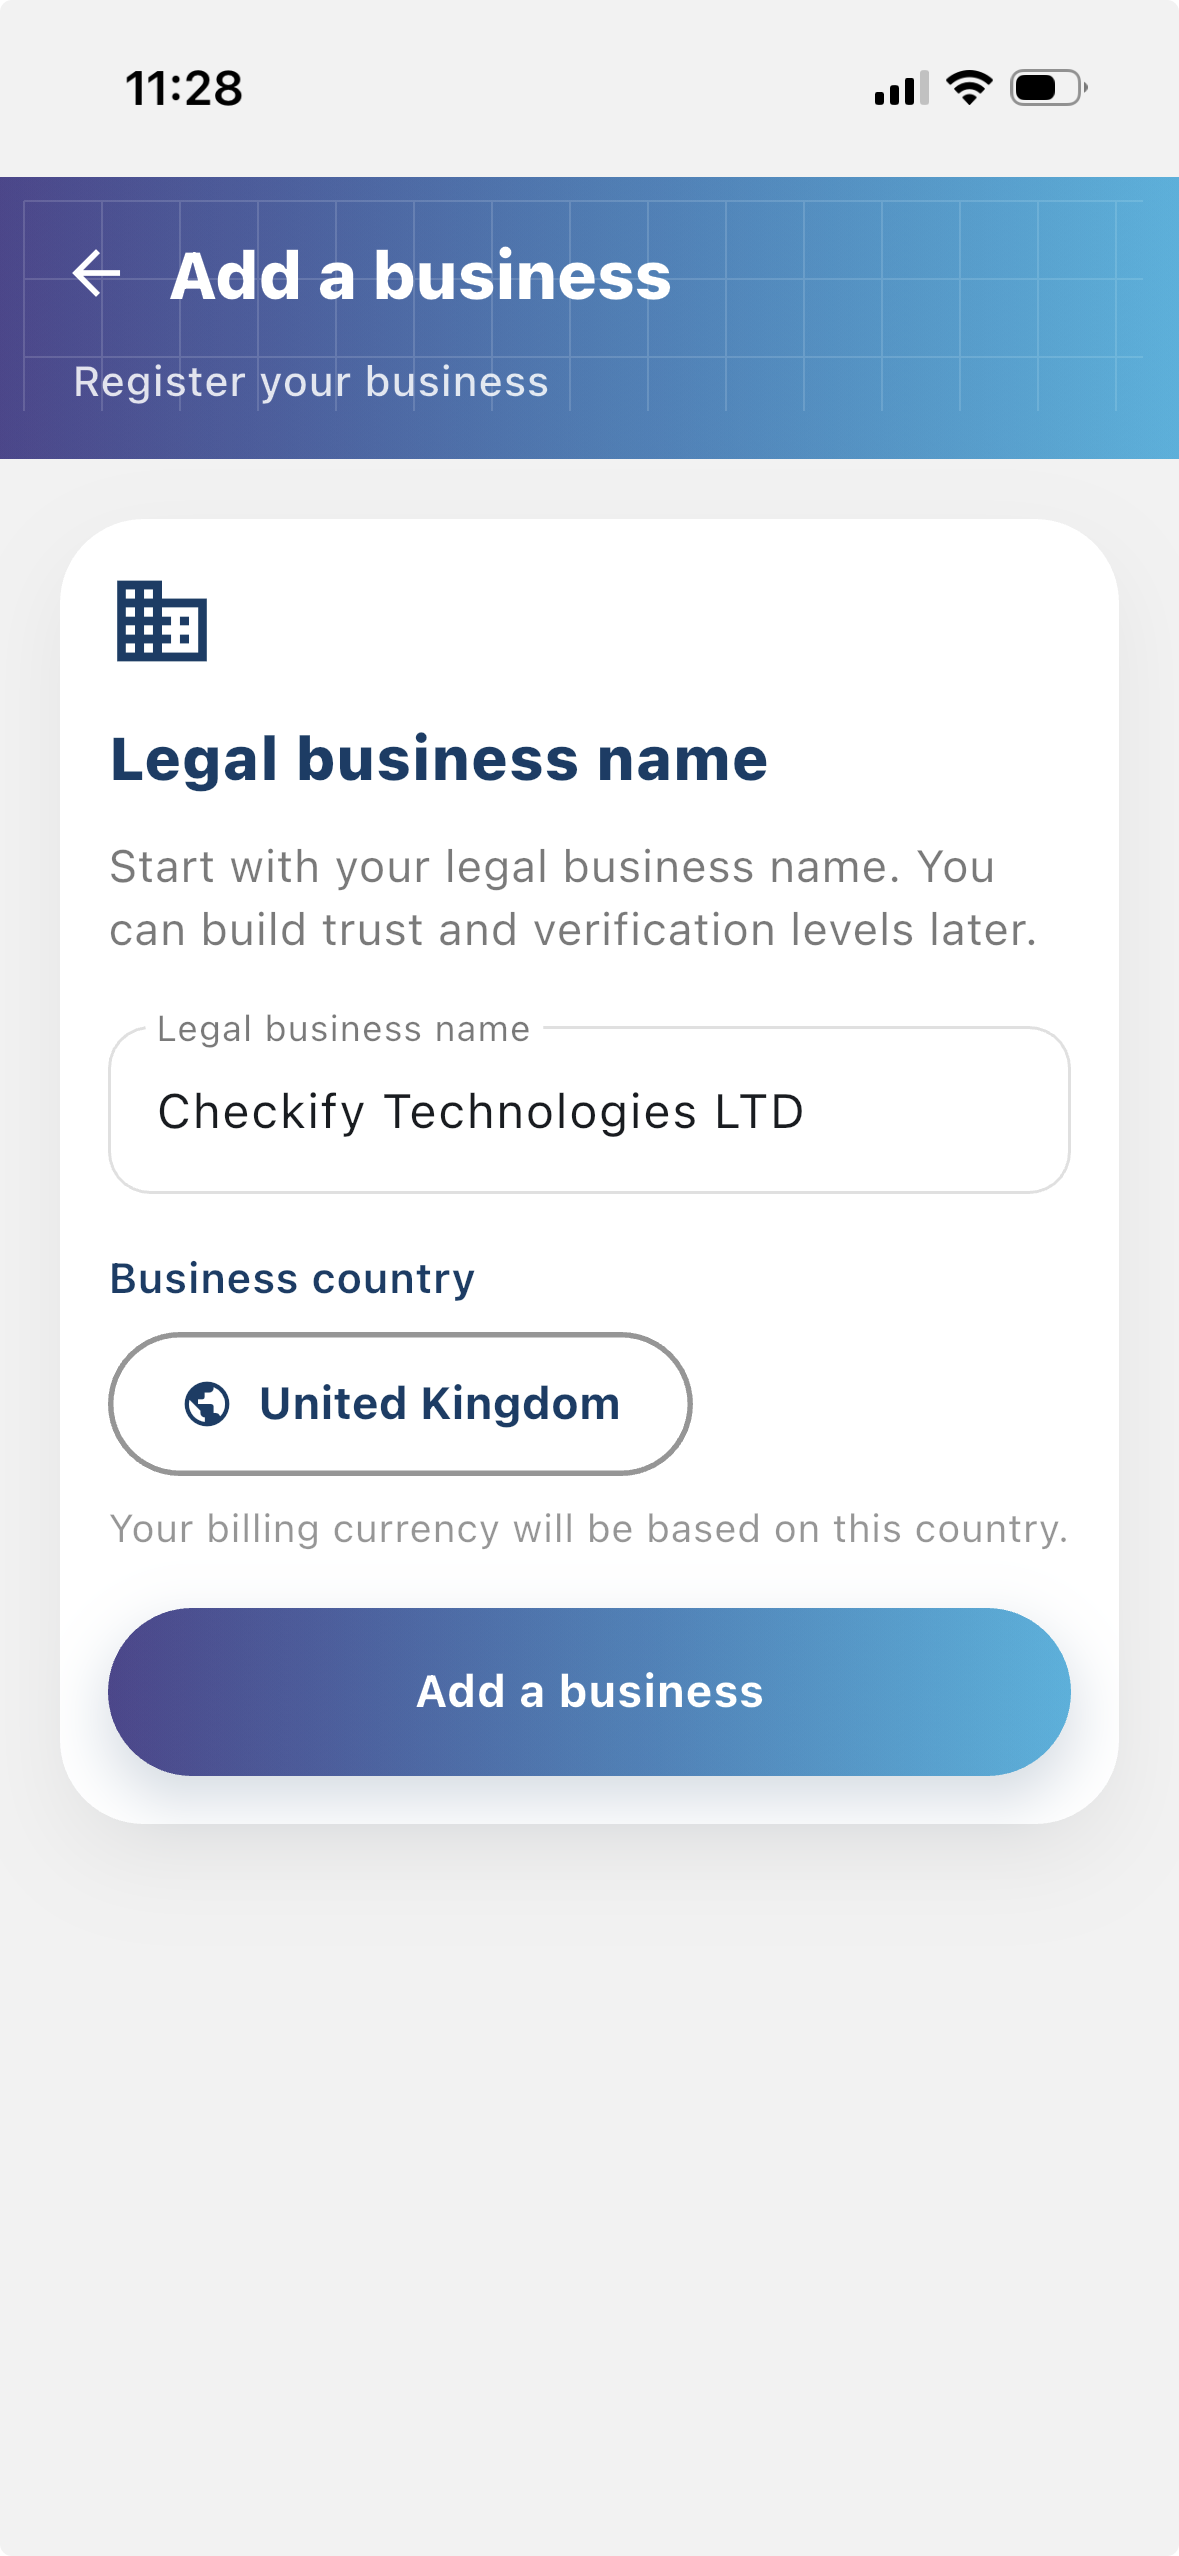
Register your business so users can see who is requesting verification. A registered business gives your Checkify flows more context and helps build trust with users.
Step 2
A site is where Checkify Passes are created and used. This can be a website, app, checkout flow, booking flow, physical venue, reception desk, counter, or other real-world location.
Step 3
A Checkify Pass is the proof request you create against a site. It defines what you want the user to prove, such as human verification, over 18, or approval for a specific action.
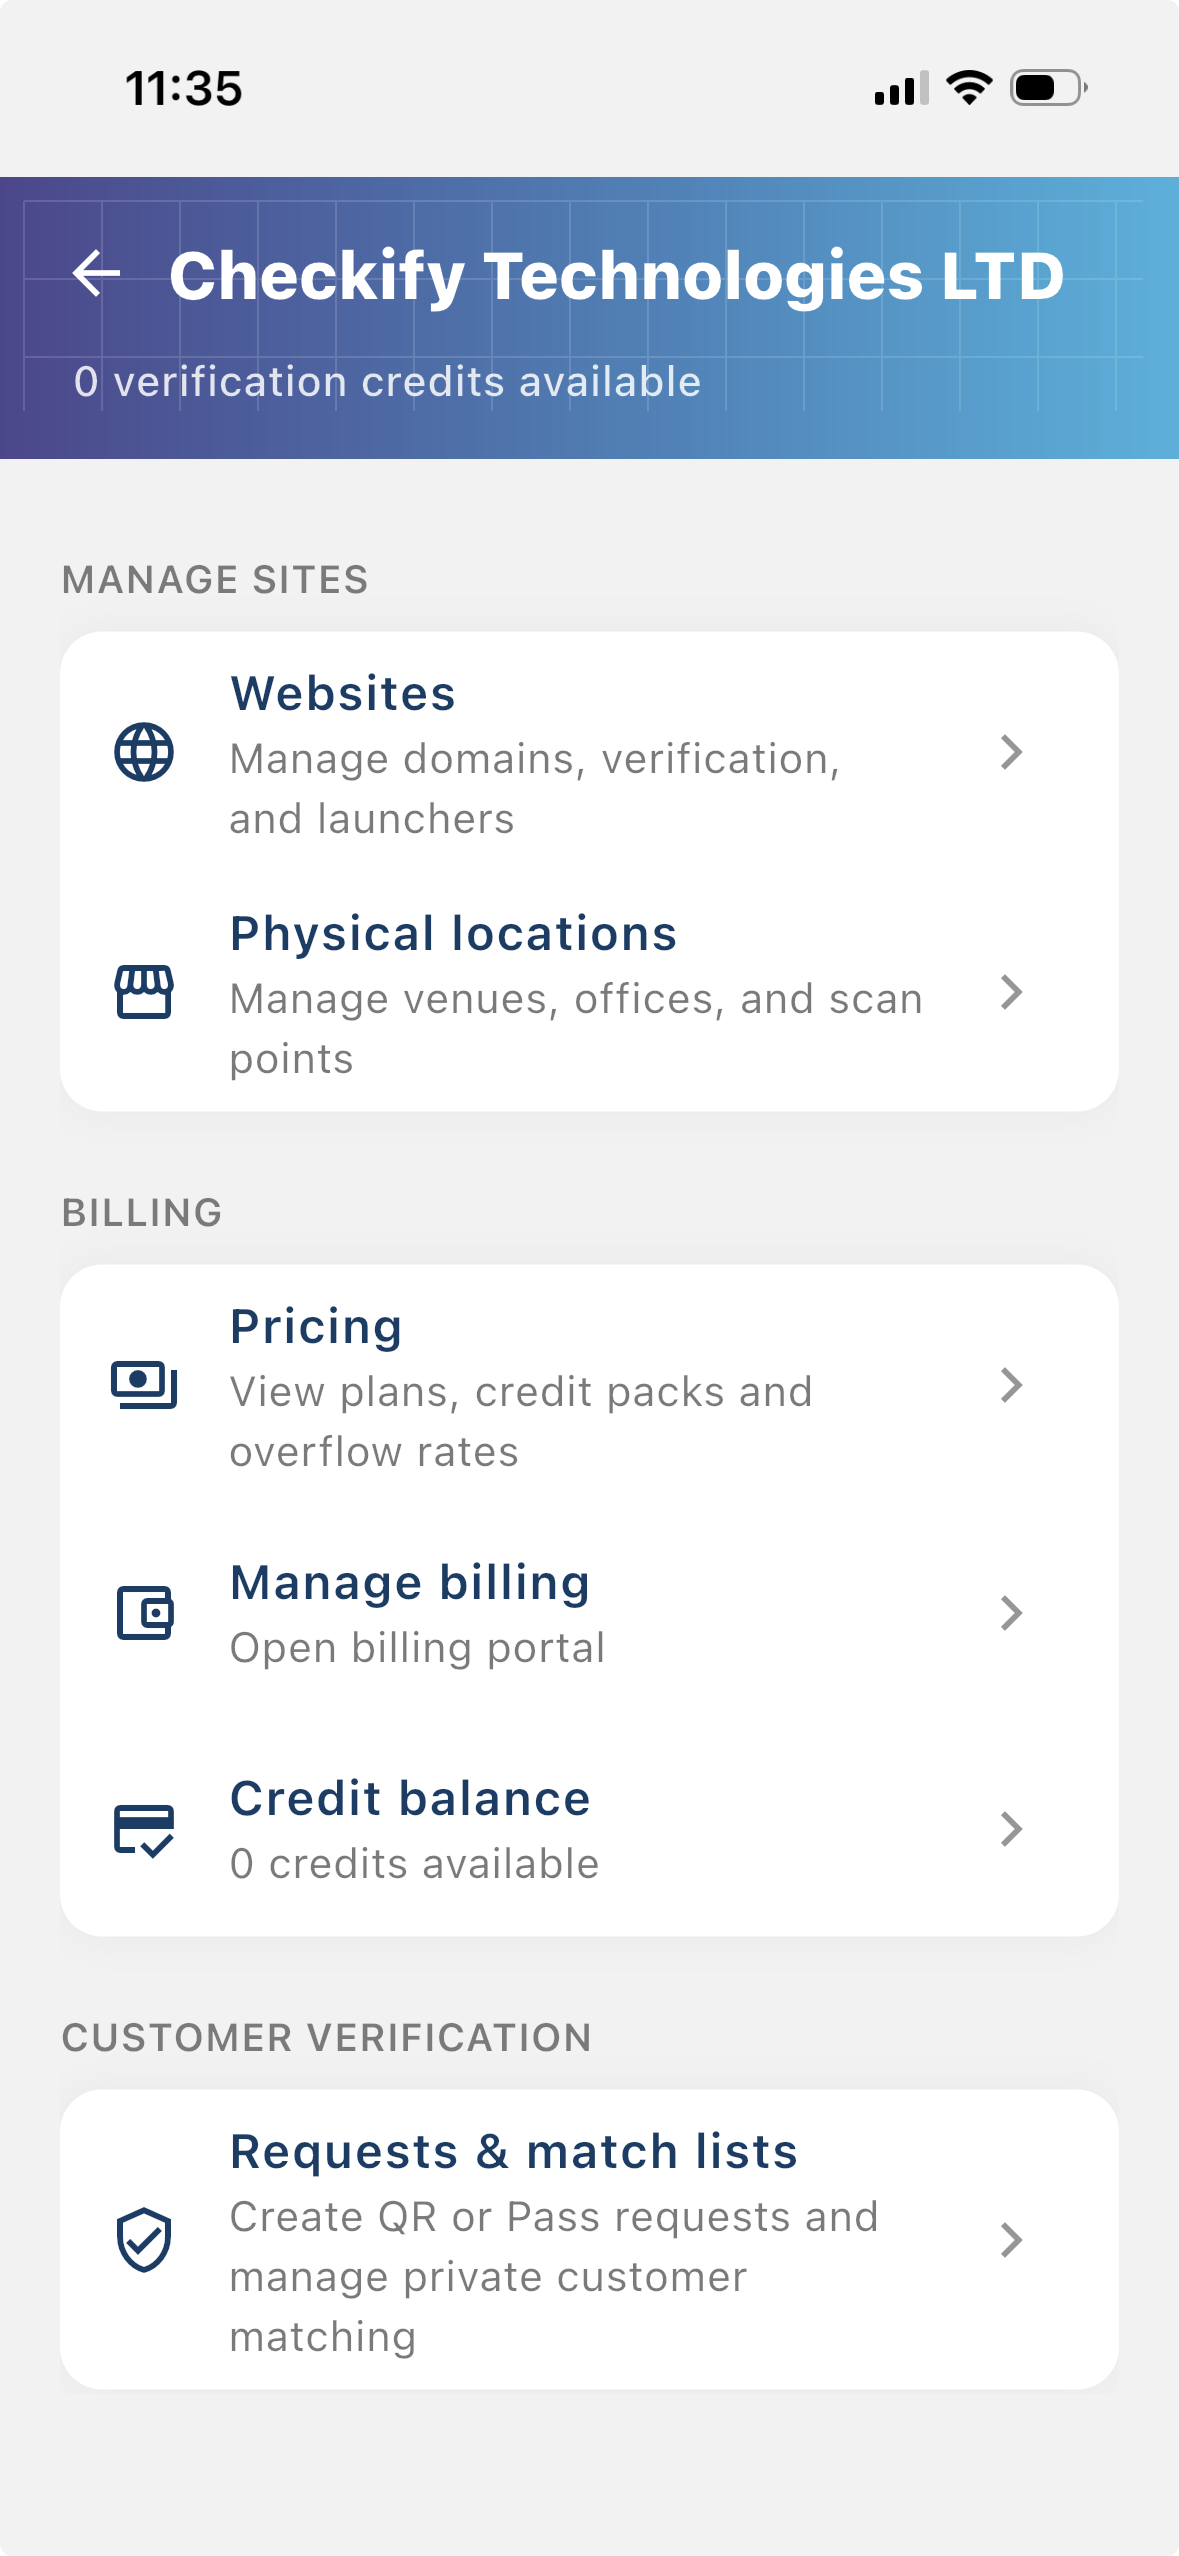
From the business menu you can:
Step 4
Go to Settings → Manage sites. Here you add websites, apps, or physical locations where Checkify Passes will be used.
Step 5
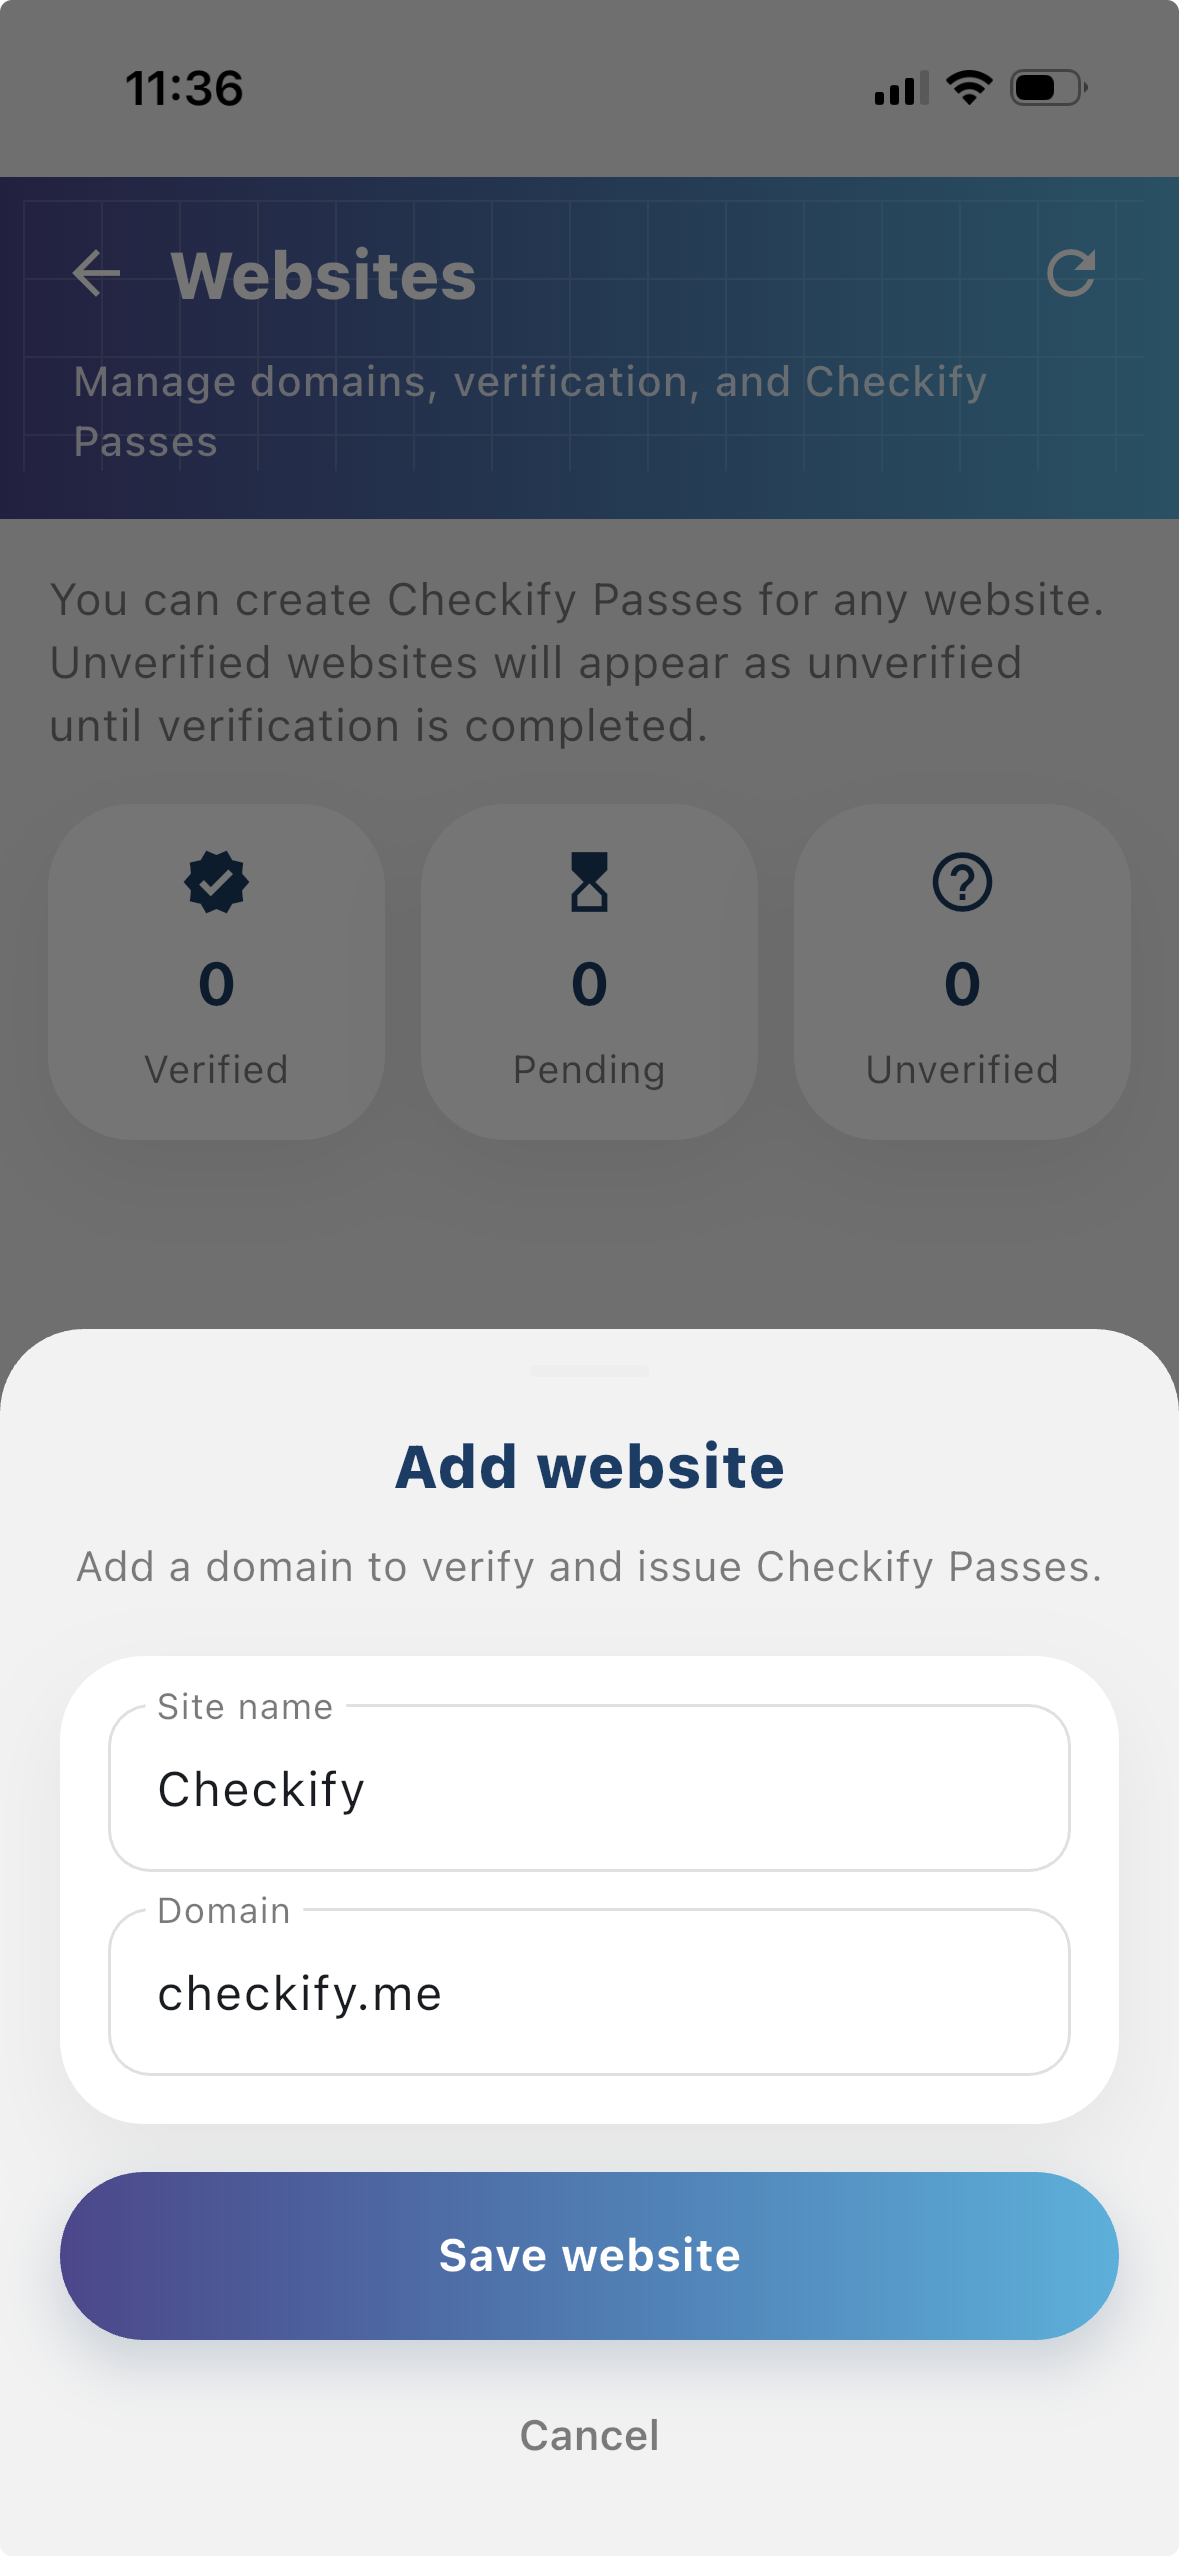
Tap to add a website or physical location. Checkify auto-provisions one Pass per site. If this is your first site, choose overflow billing and save a card when prompted — you are only charged after your free 100 credits are used up.
New businesses get 100 free credits on sign-up. These are applied automatically when your business is created.
By selecting overflow billing, you will only be charged once your free 100 credits have been used up. You can cancel your subscription at any time.
You can also register at checkify.me, sign in with the app, and manage sites from the business dashboard. The app setup above is the fastest path for most teams.
Register on checkify.me →Start with one site, one proof request, and one business flow. Then increase your business trust level as you grow.